
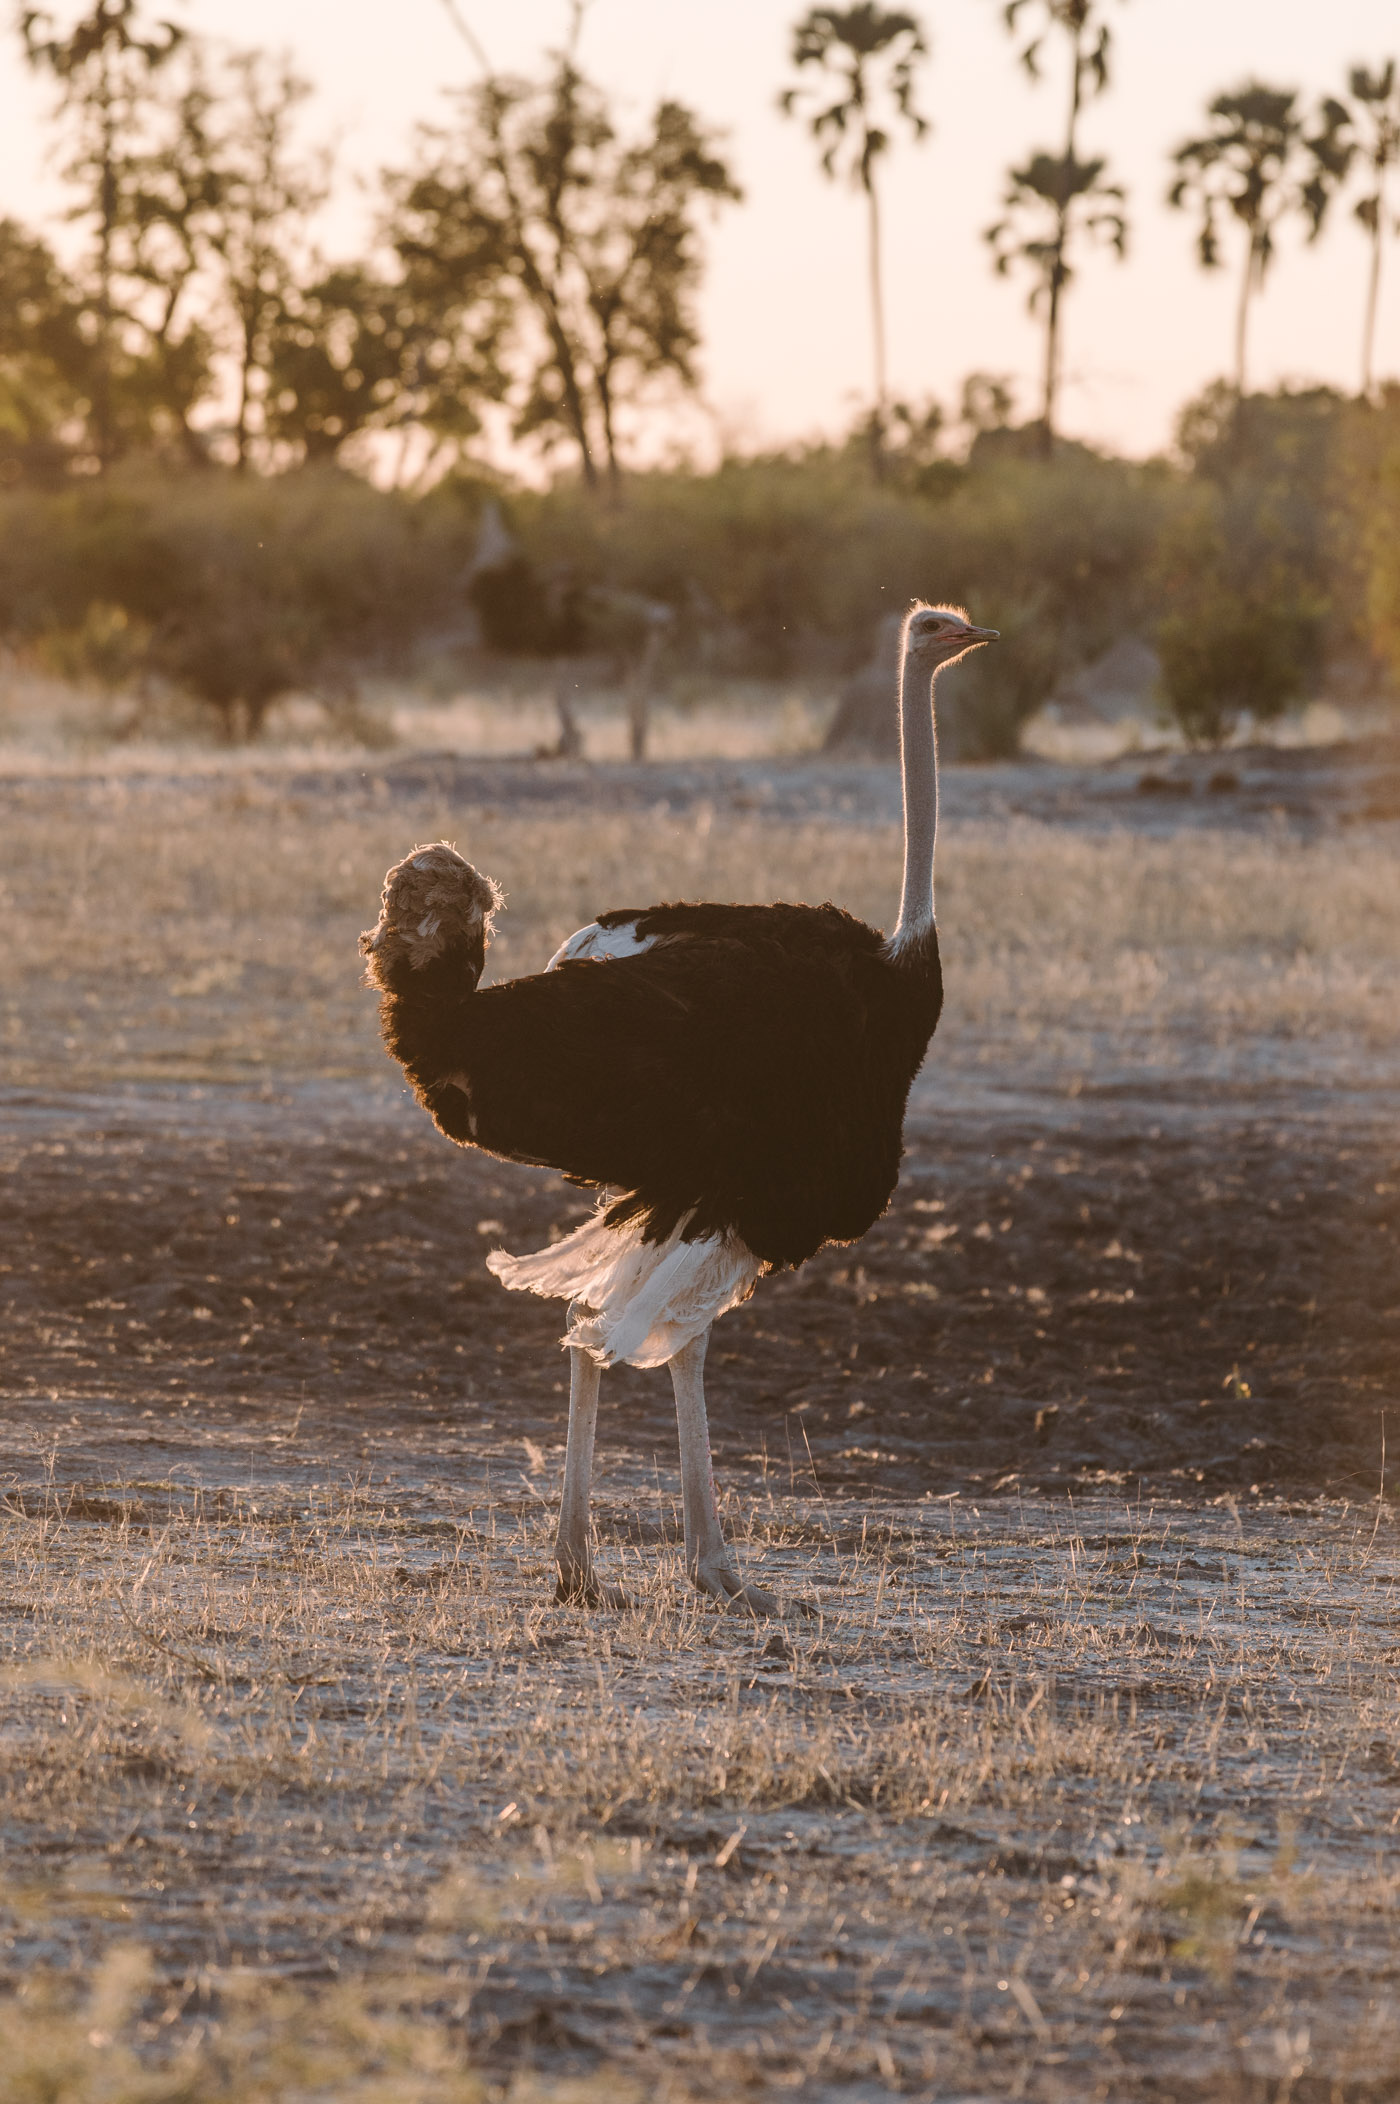
On my recent safari trip to Zambia and Botswana I tried my hands on wildlife photography with my new Nikon Z 6 mirrorless camera. This is the first time I shot wildlife with the new camera and I was eager to see how it performs in challenging situations. And when it comes to travel photography, wildlife can be the most challenging part!
Wildlife photography can be pretty demanding.
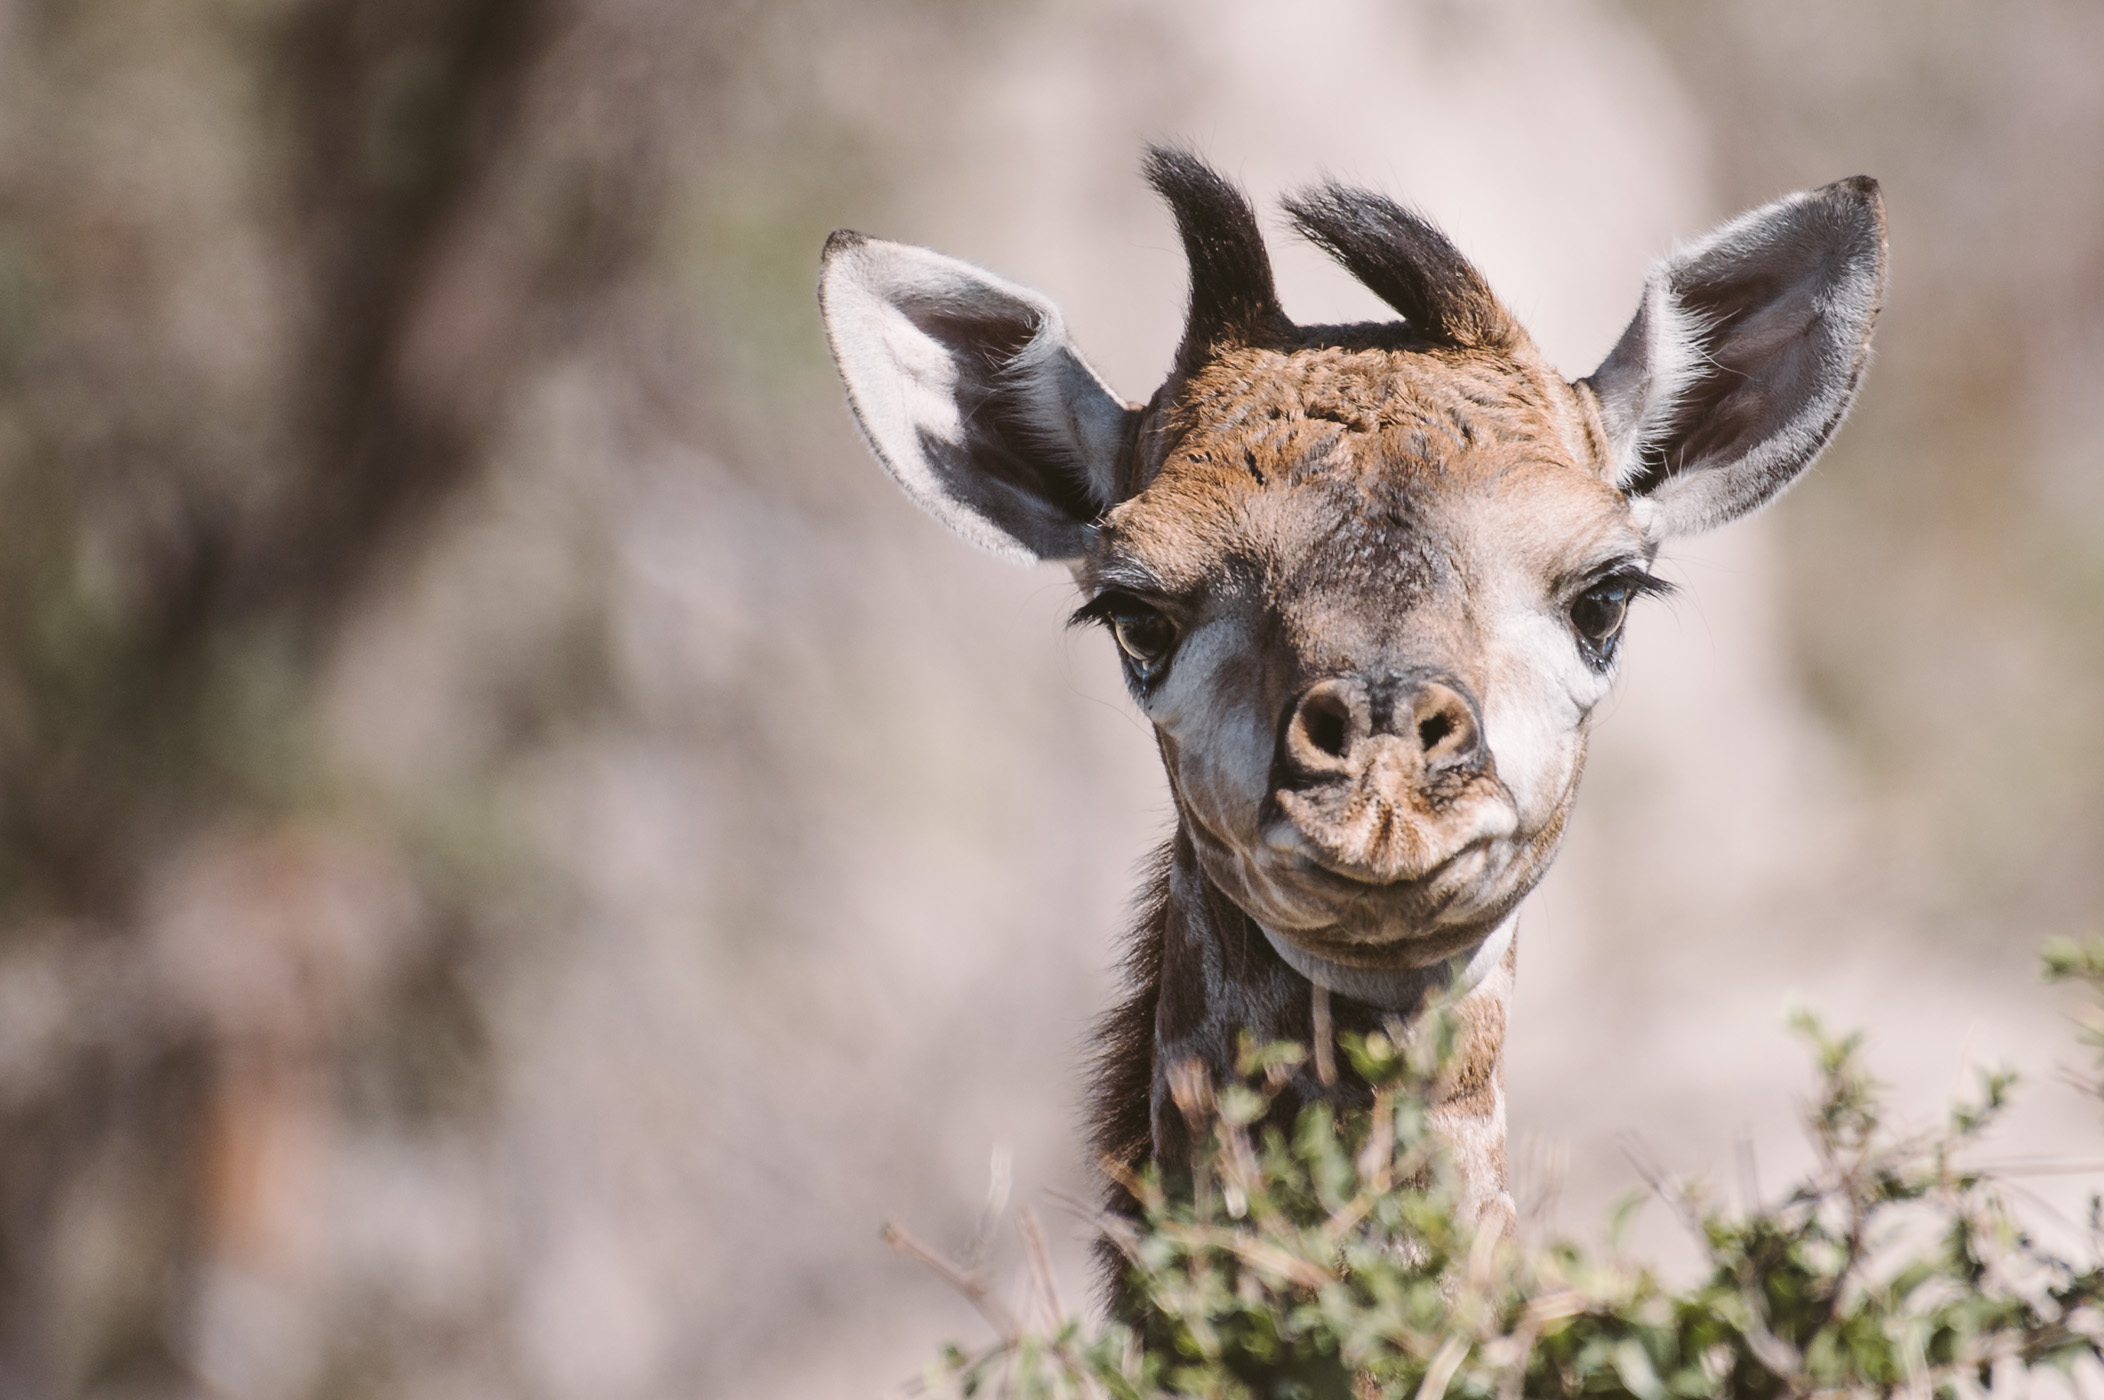
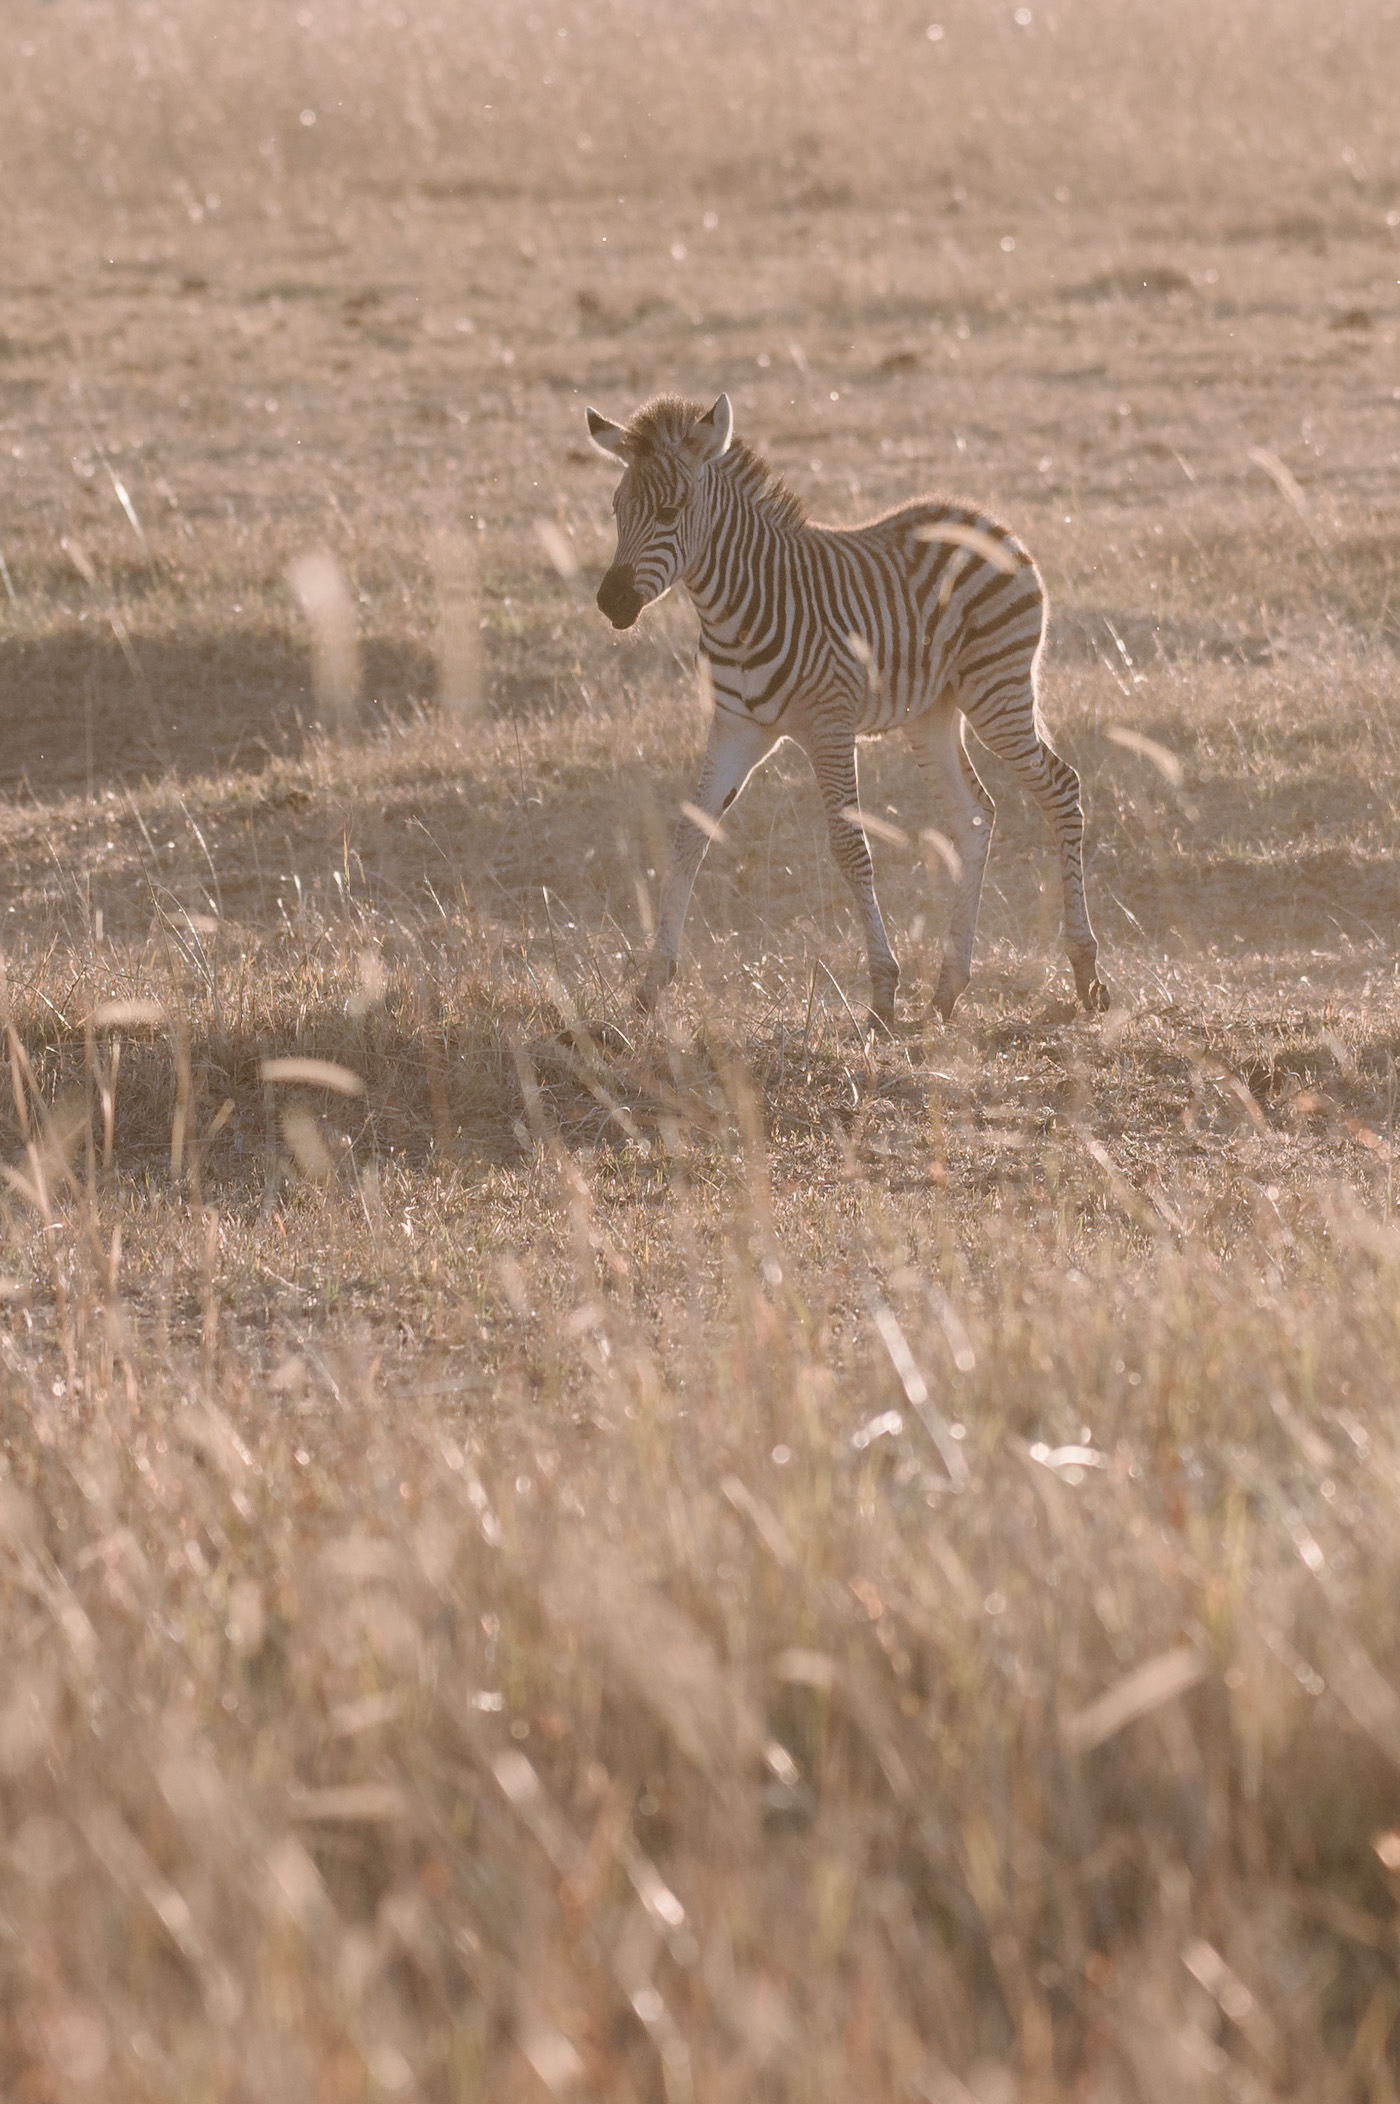
This baby giraffe only looked at us for a second before it decided to run!
Settings: 500mm, f/5.6, 1/1000 sec, ISO 280.
Facts & Figures
To properly shoot wildlife you need your camera to fulfil a couple of technical criteria – especially when it comes to speed, autofocus and image size. The Nikon Z 6 is a mirrorless full frame camera, so the sensor is as big as with professional DSLRs. It features 24,5 megapixel, which allows for cropping without loosing too much resolution in post production. And last but not least speed – that’s where the Nikon Z 6 excels – as it can fire up to 12 photos per second, which is essential with moving subjects.
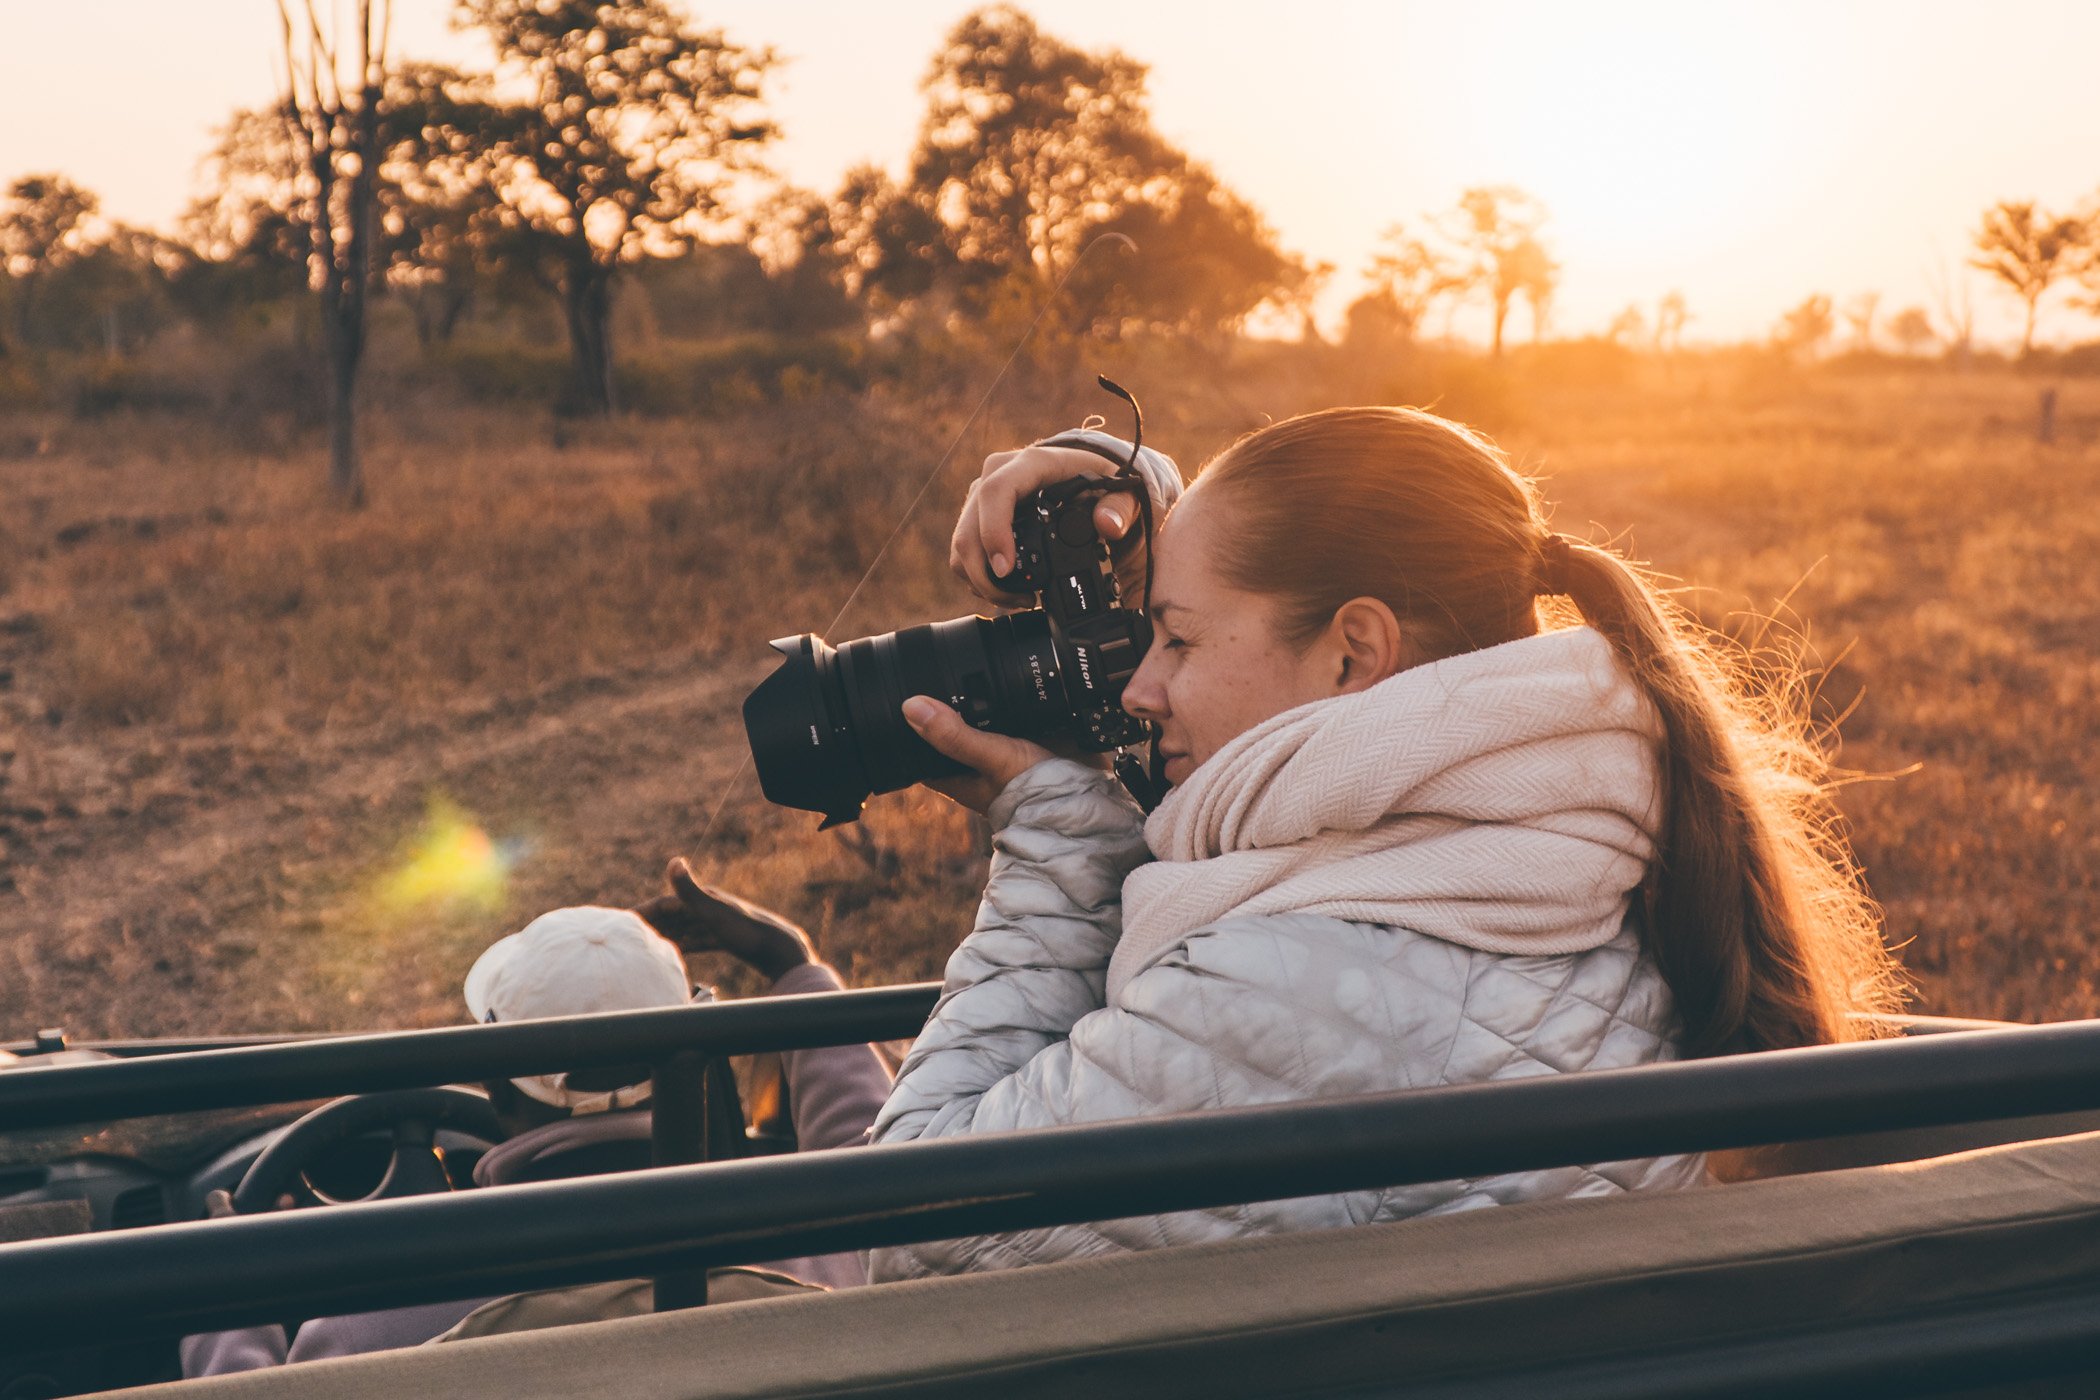
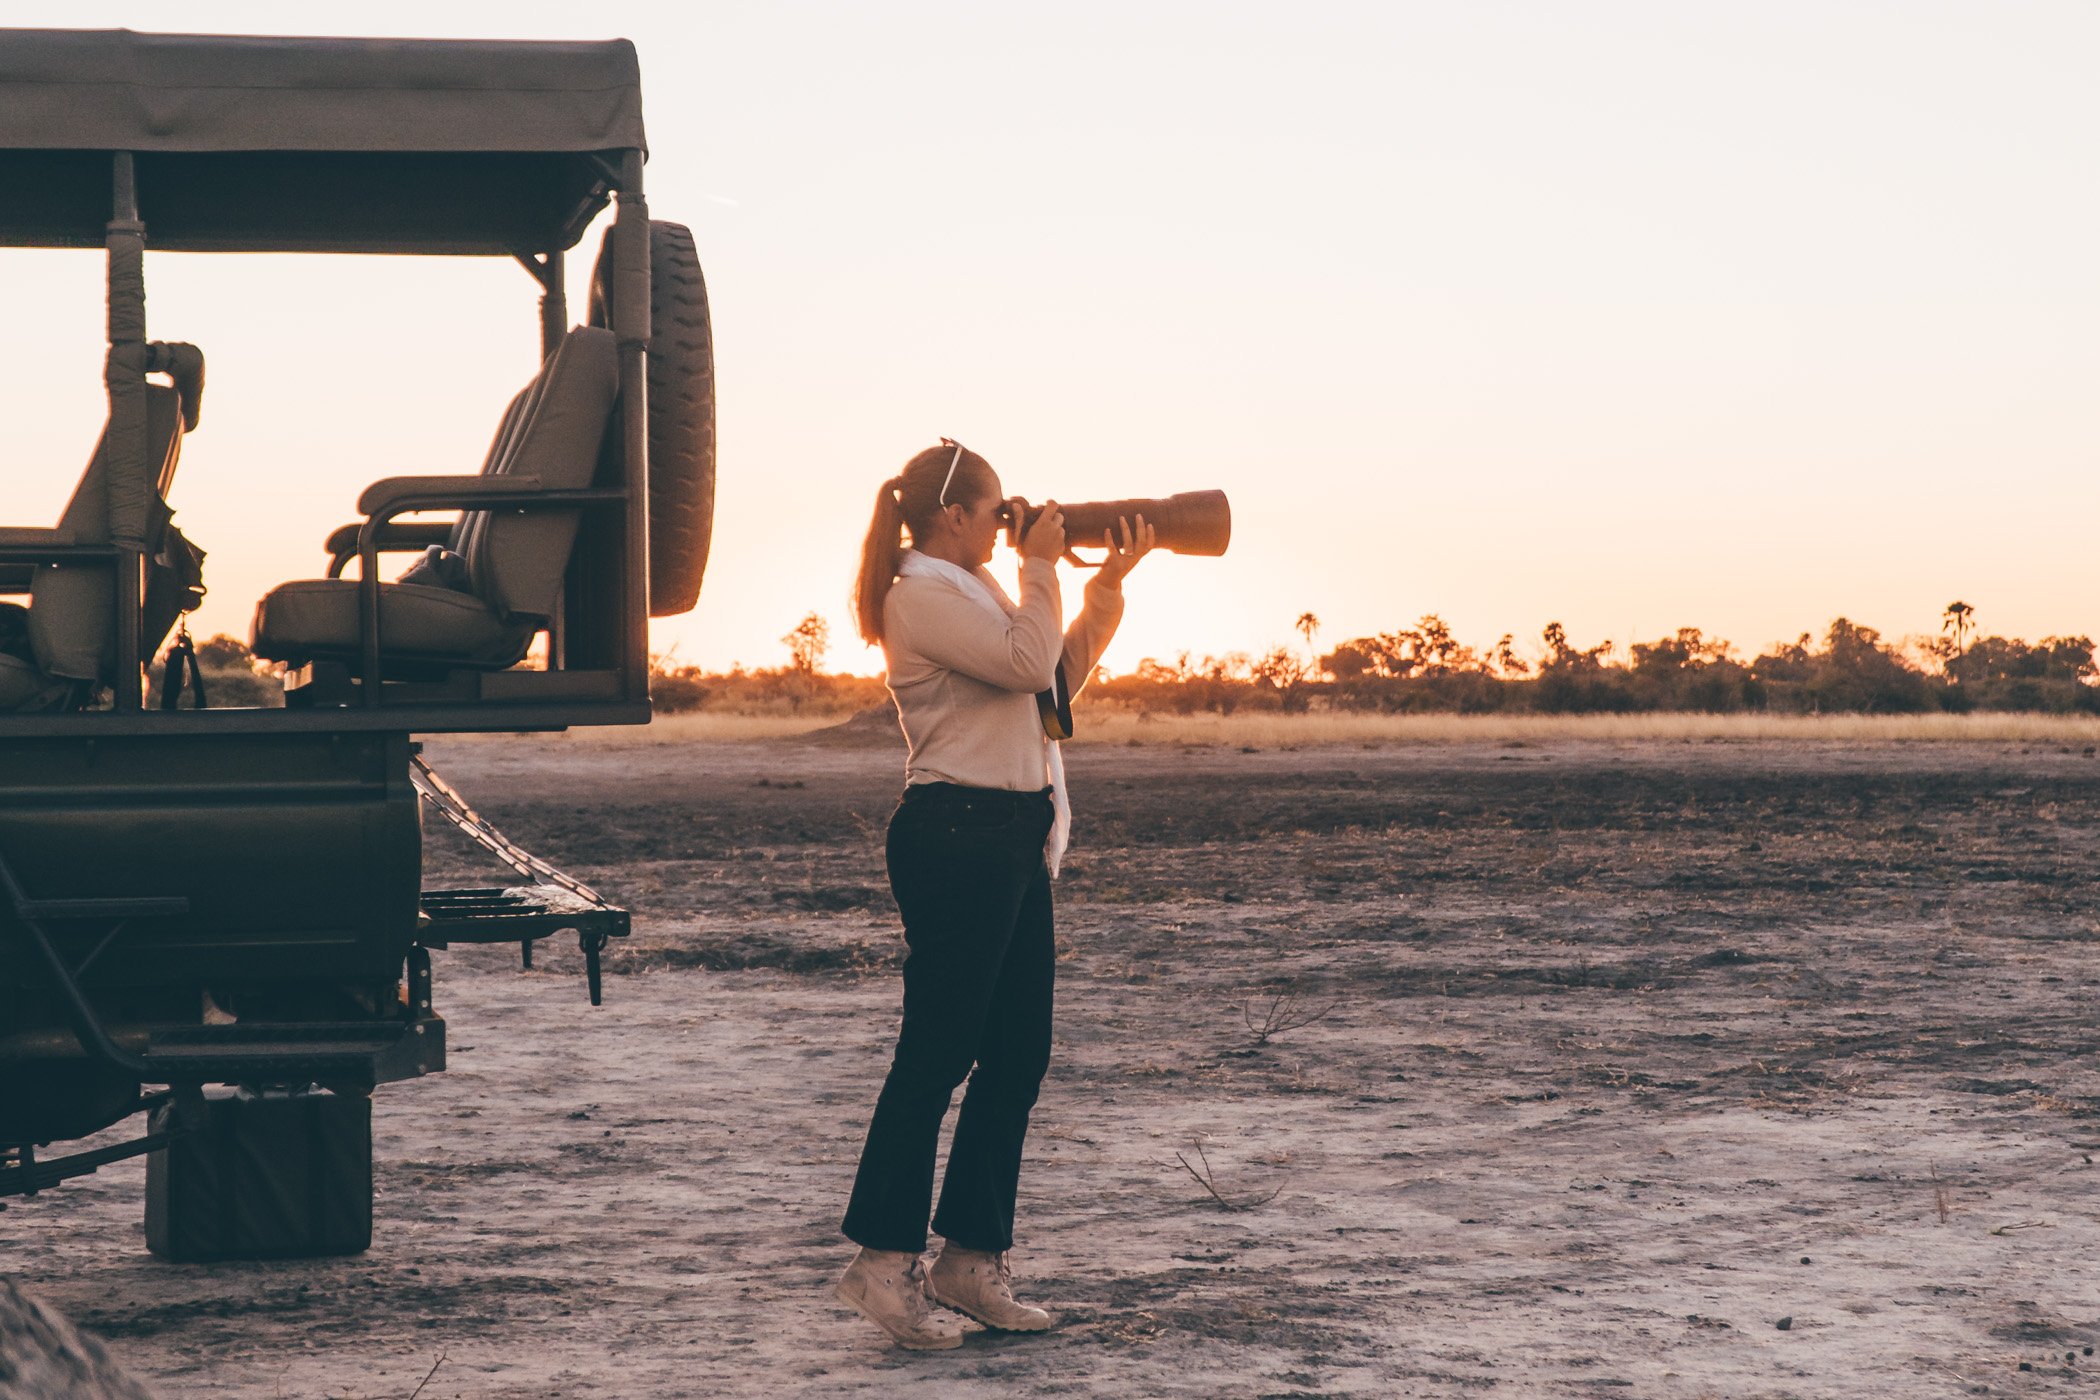
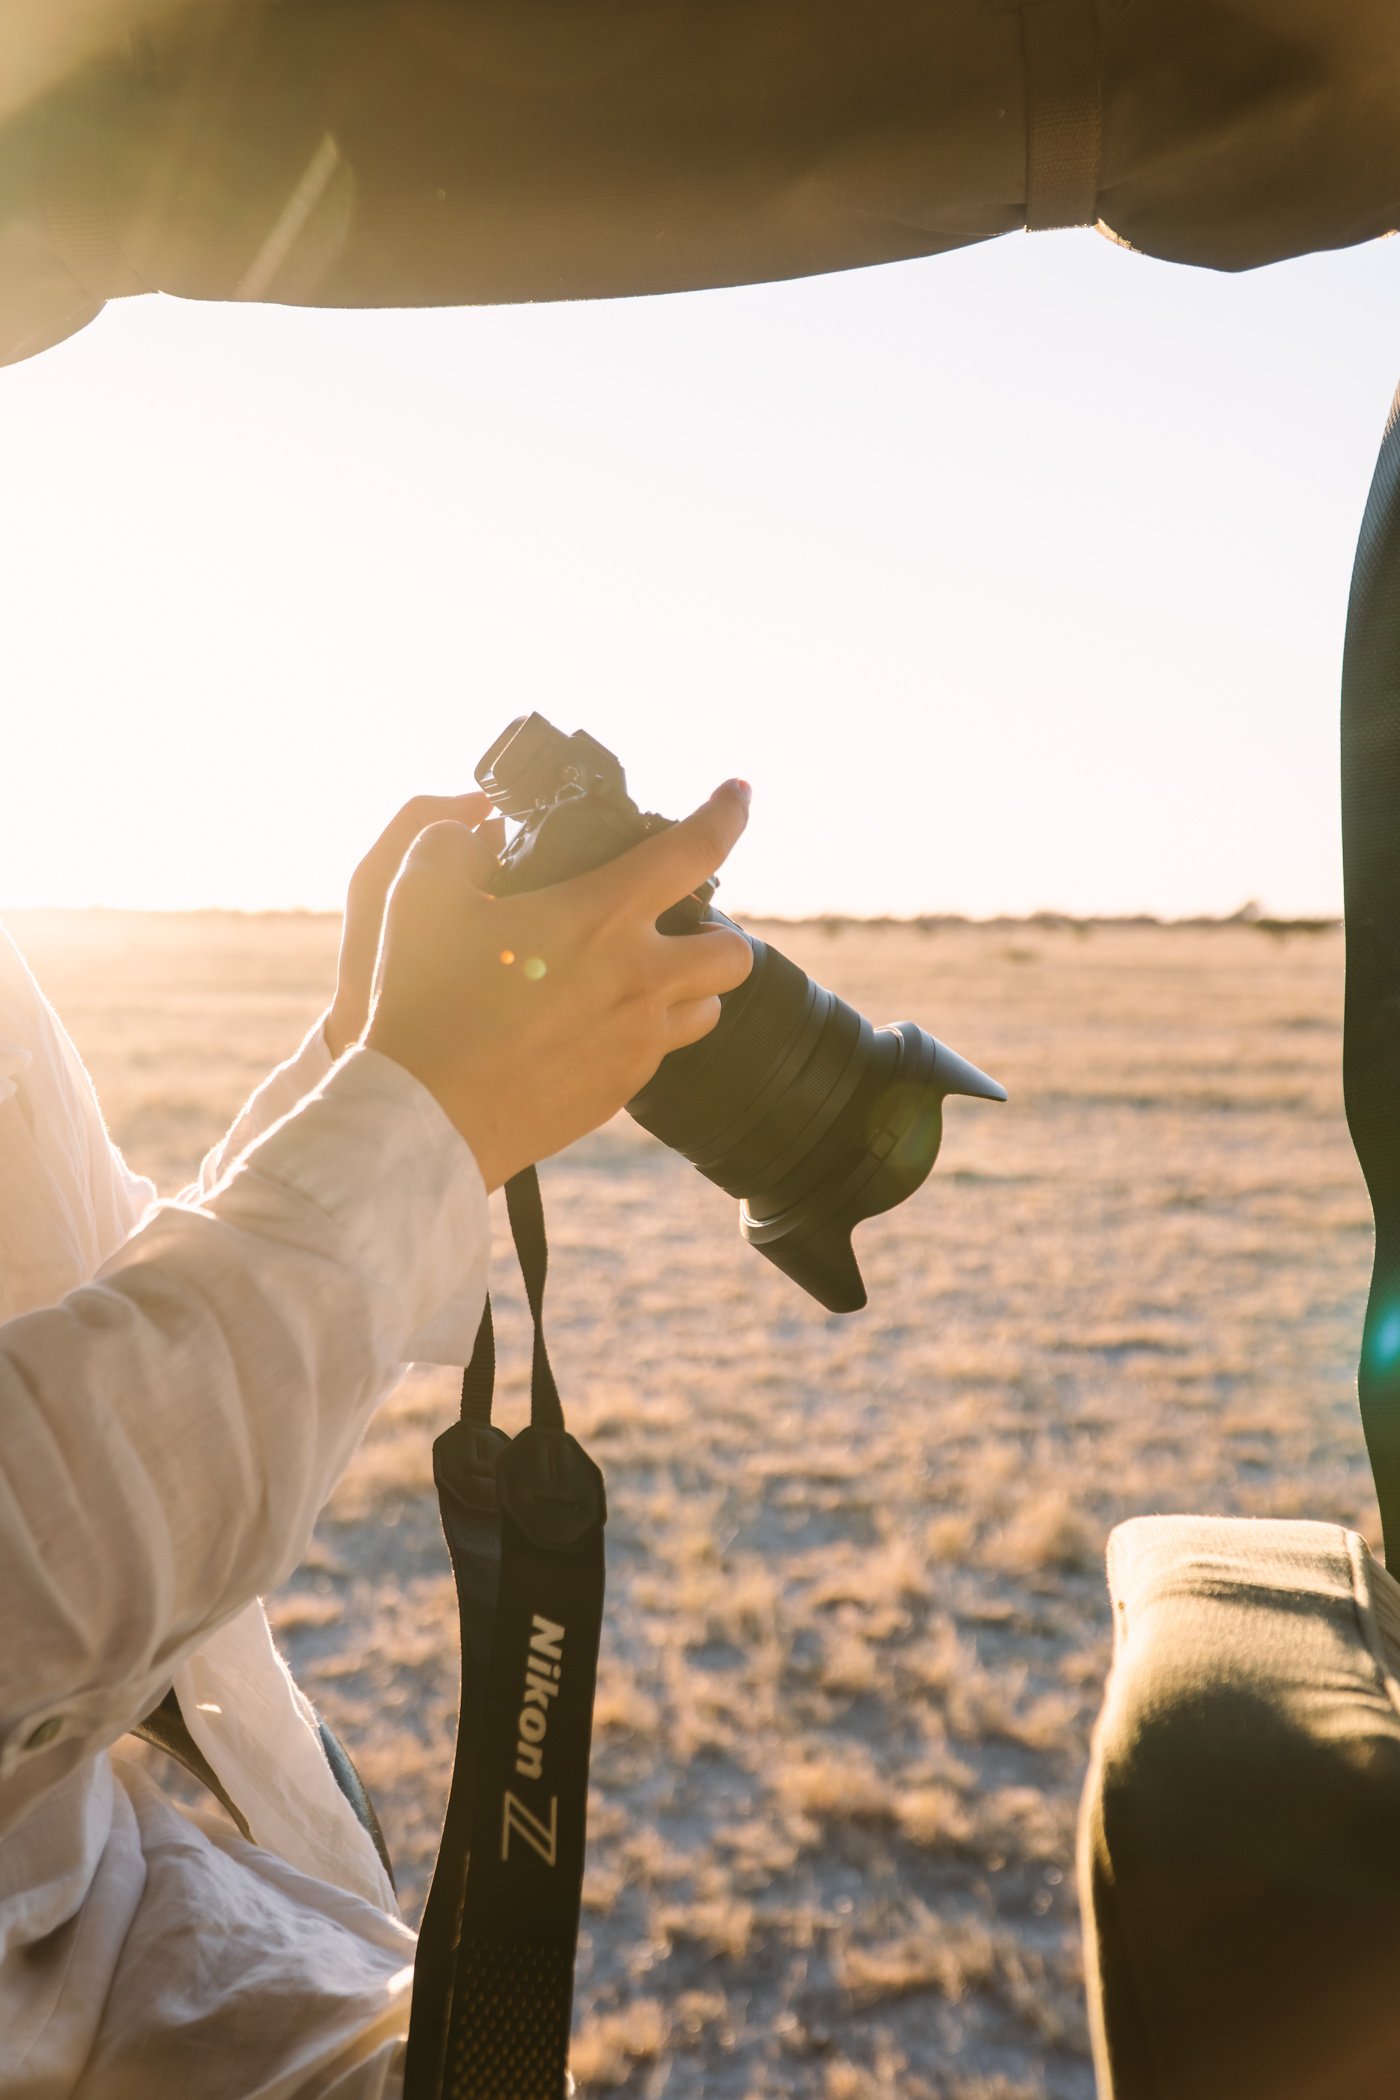
This is me shooting with the Nikon Z 6 and the new NIKKOR Z 24-70mm 2.8 lens.
I only used this lens when animals where either close-by or I wanted to shoot scenery and landscapes.
Armed with these facts I felt like I was well prepared for wildlife photography with the Nikon Z 6. Additionally the camera allows ISO to go up to 51.200 (I never had to go up that high, but this suggests that the camera and it’s ISO handling performs better in low light than my previous DSLR).
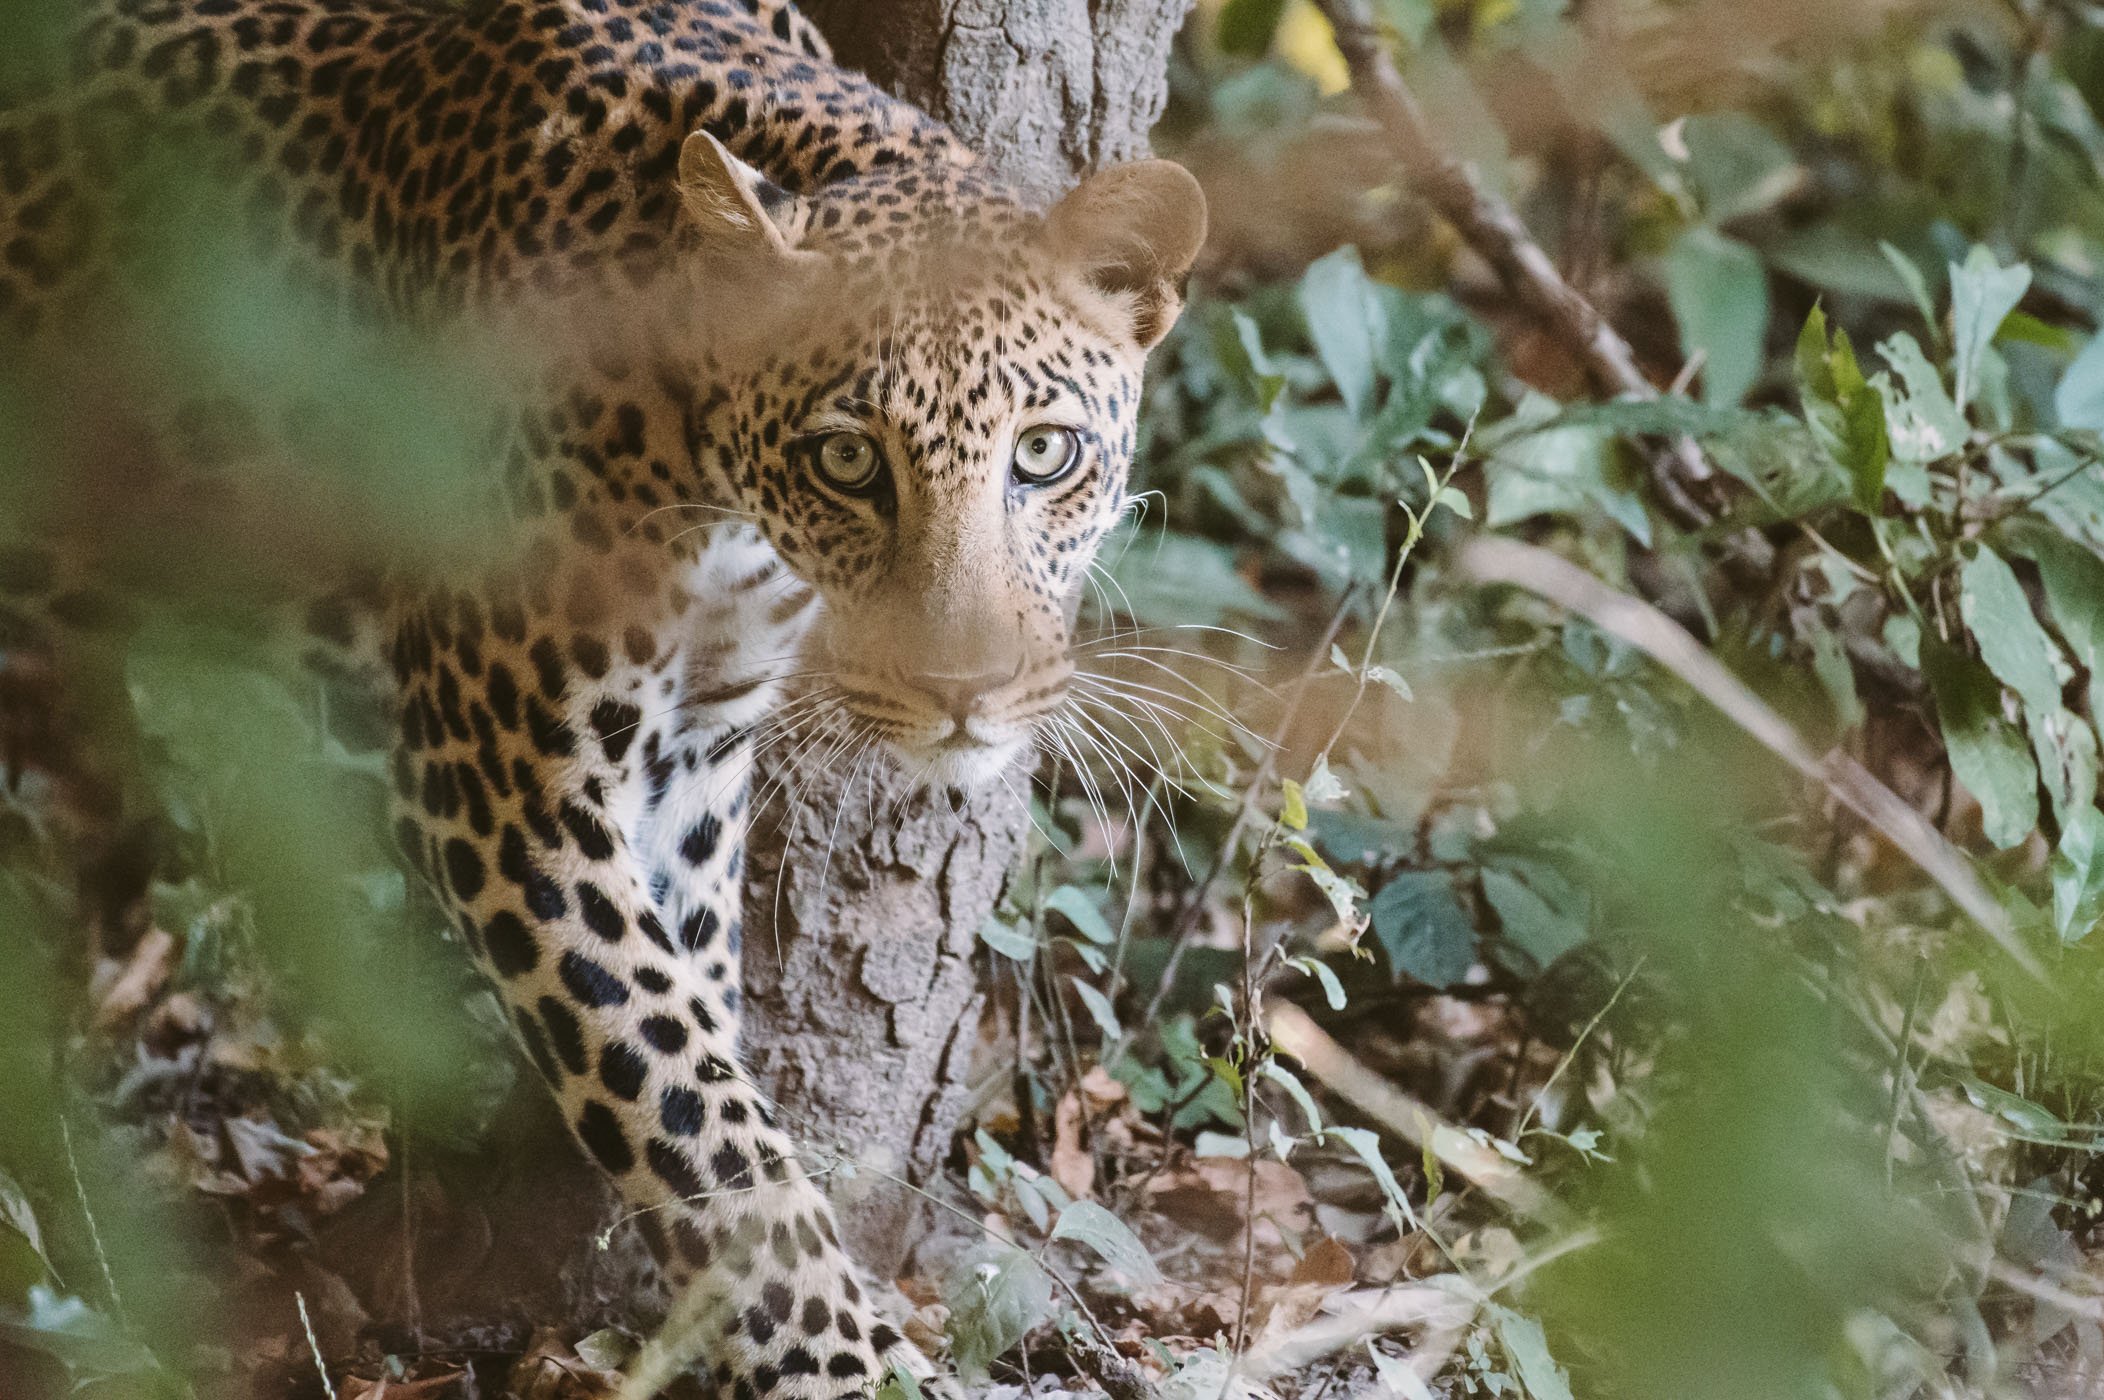
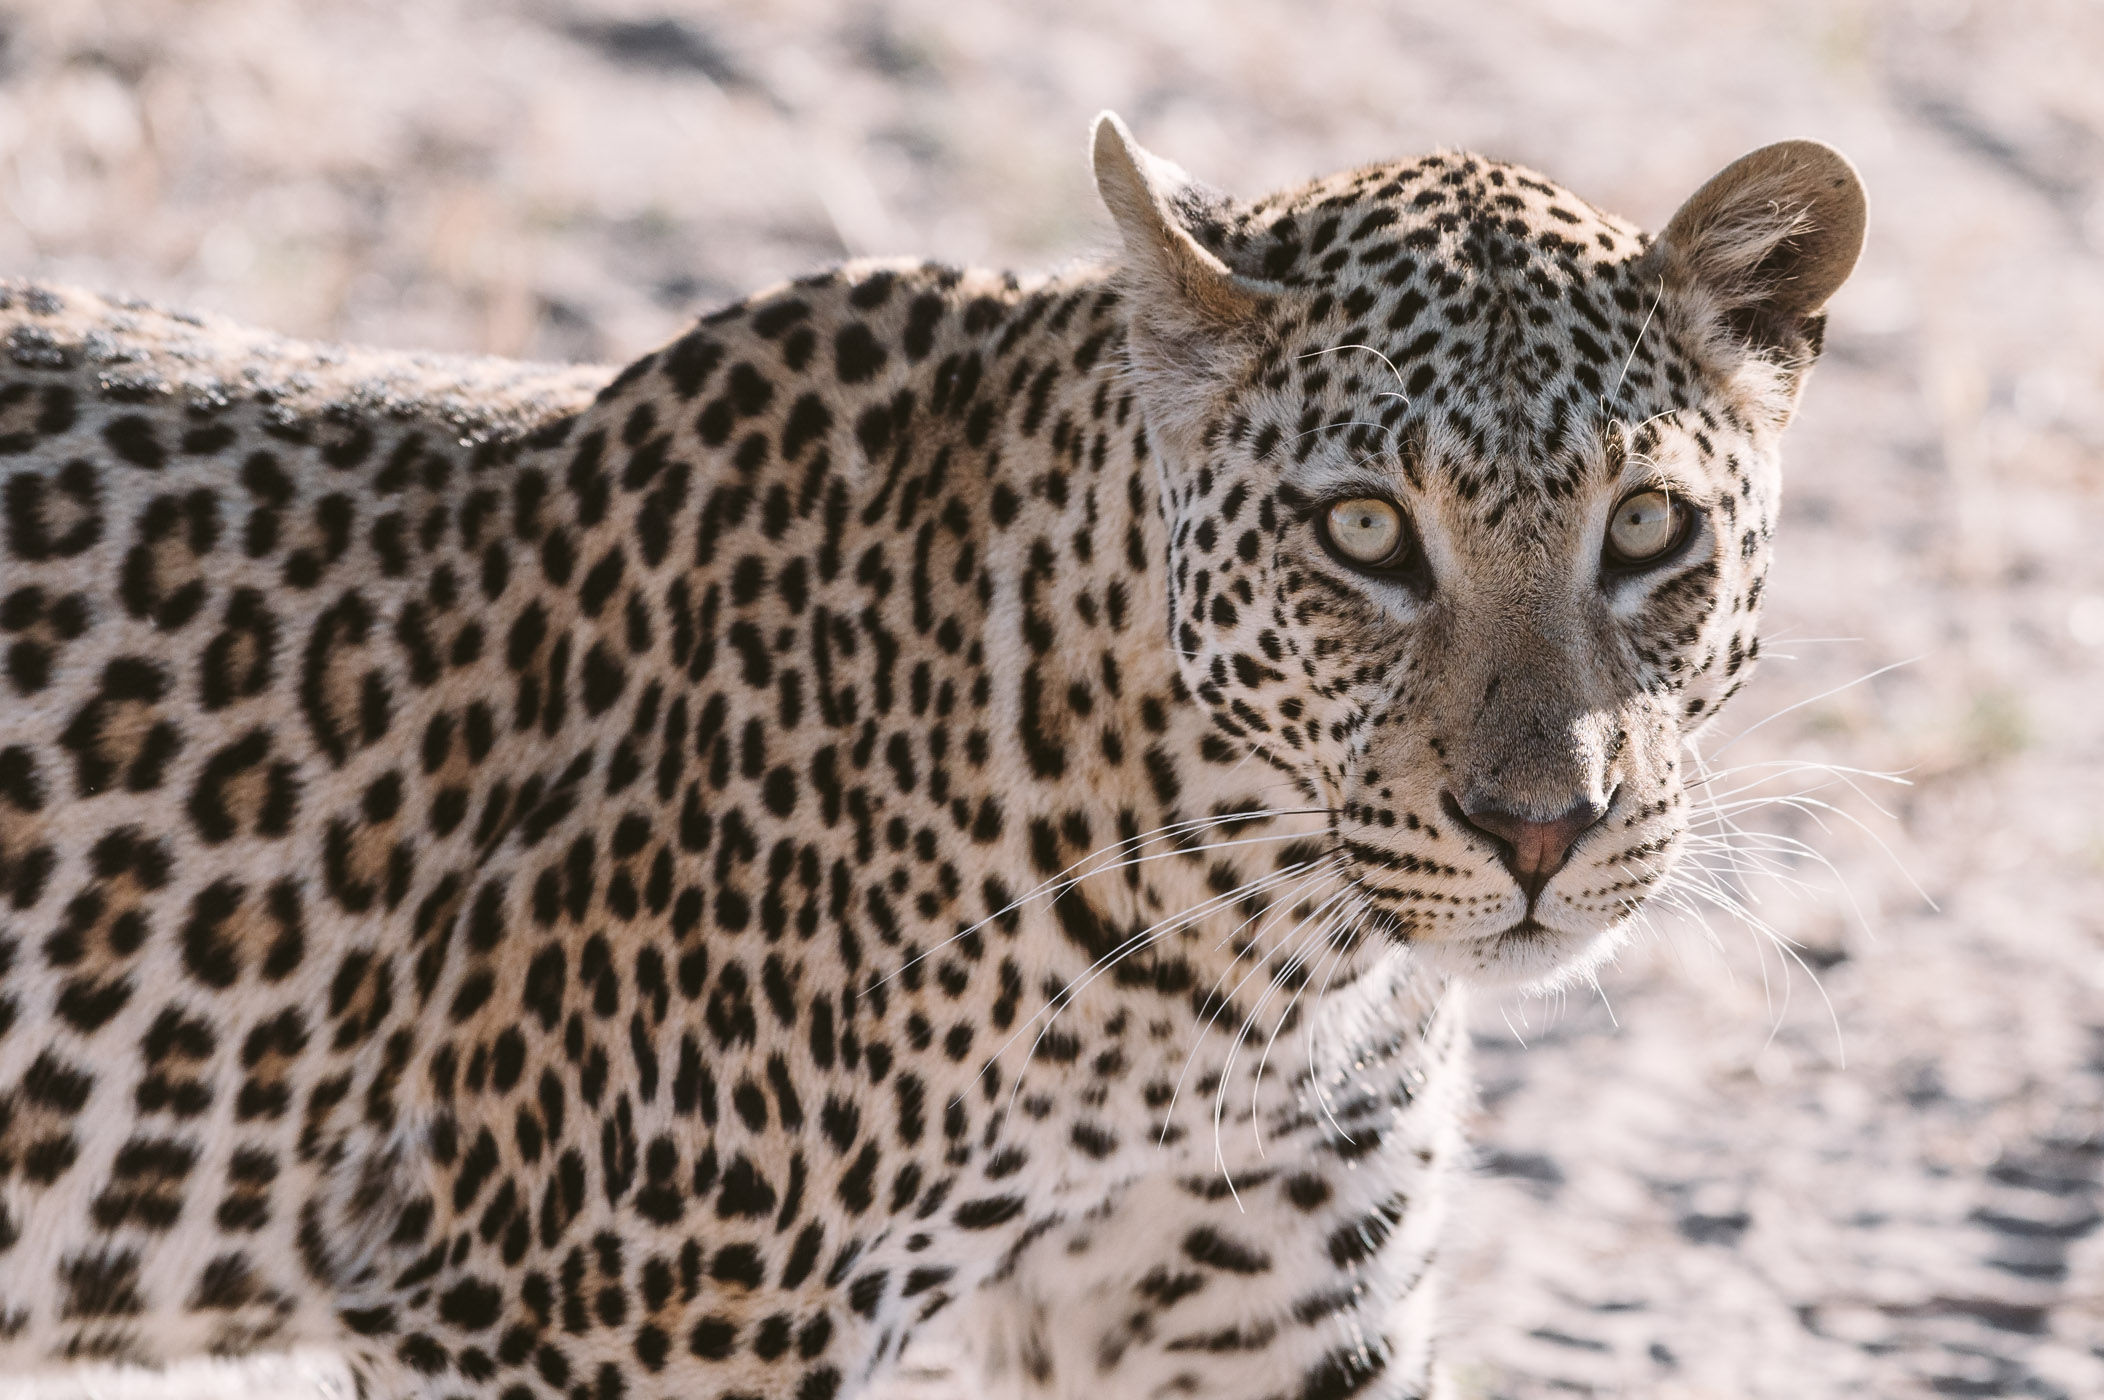
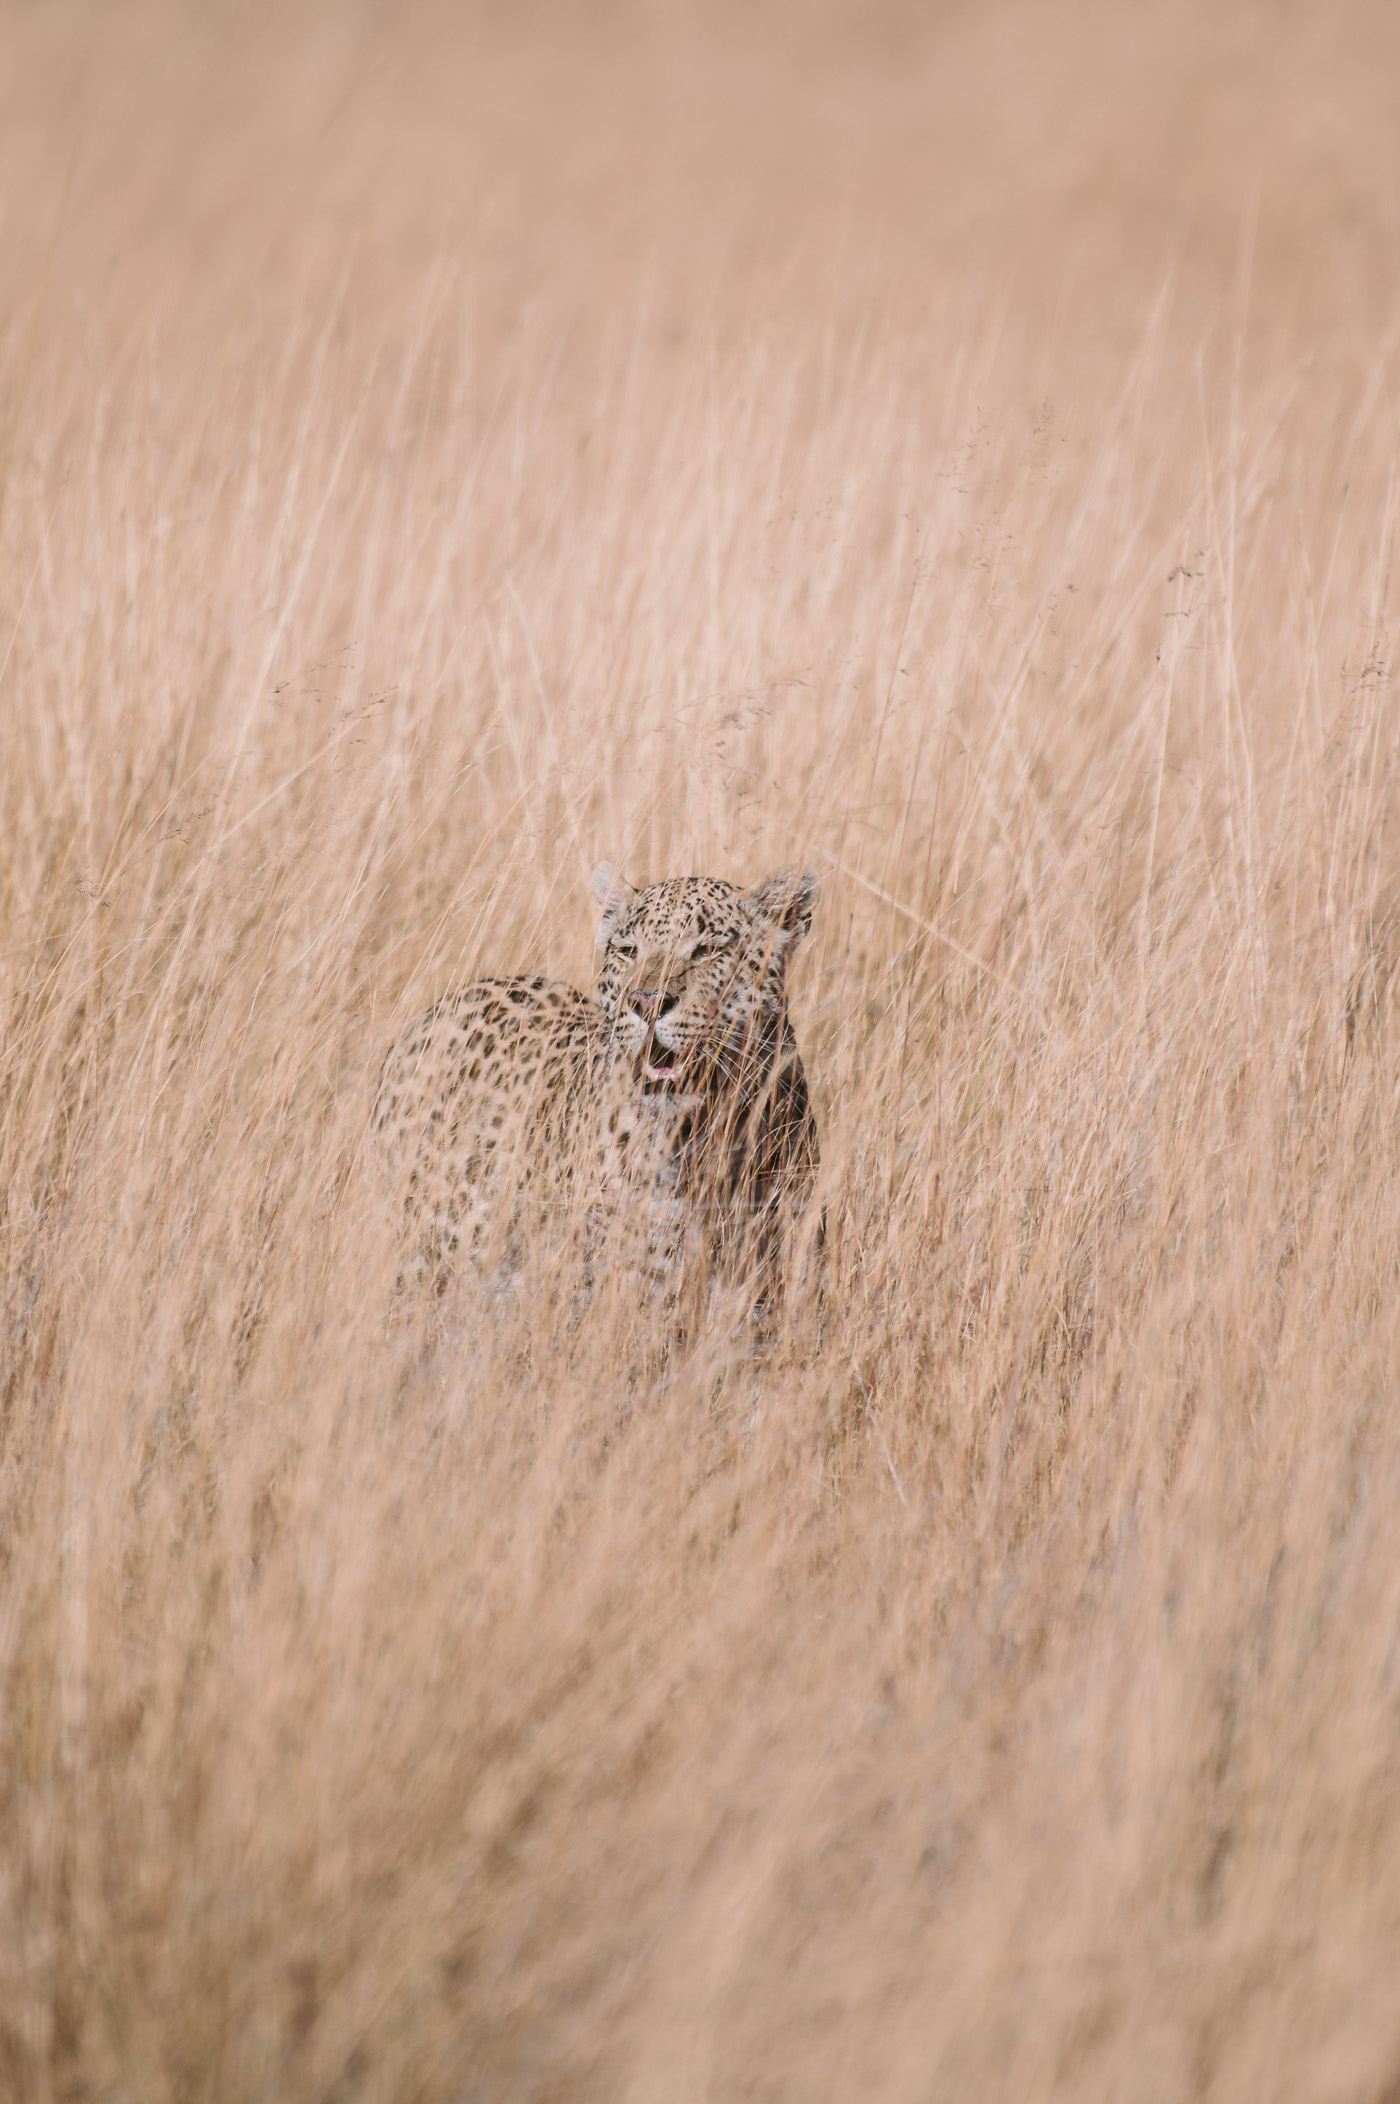
Leopard sightings are rare and shooting them can be challenging.
Especially when they hide in the thicket and it’s dark, but they keep moving.
Good performance even when shooting with higher ISO is therefore essential!
Settings: 500mm, f/5.6, 1/1000 sec, ISO 22.800.
Additional useful features of the Nikon Z 6:
- Image stabilisation: 5 axis built-in image stabilisation (vibration reduction helps a lot when shooting moving subjects with long focal lengths)
- Durability: The Z 6 is water & dust sealed like the professional DSLRs of Nikon (that’s a necessity when shooting in the bush and where Nikon excels when compared to other mirrorless cameras!)
- Buffer speed: Even when shooting at 12fps (super high speed) the camera’s buffer won’t fill, because of the super high speed XQD memory cards. Nothing would be worse than having the scenery of your life unfold before your eyes and your buffer blocking your shots.
So, with these facts let’s explore the wildlife of Zambia and Botswana to test the new Nikon Z 6!
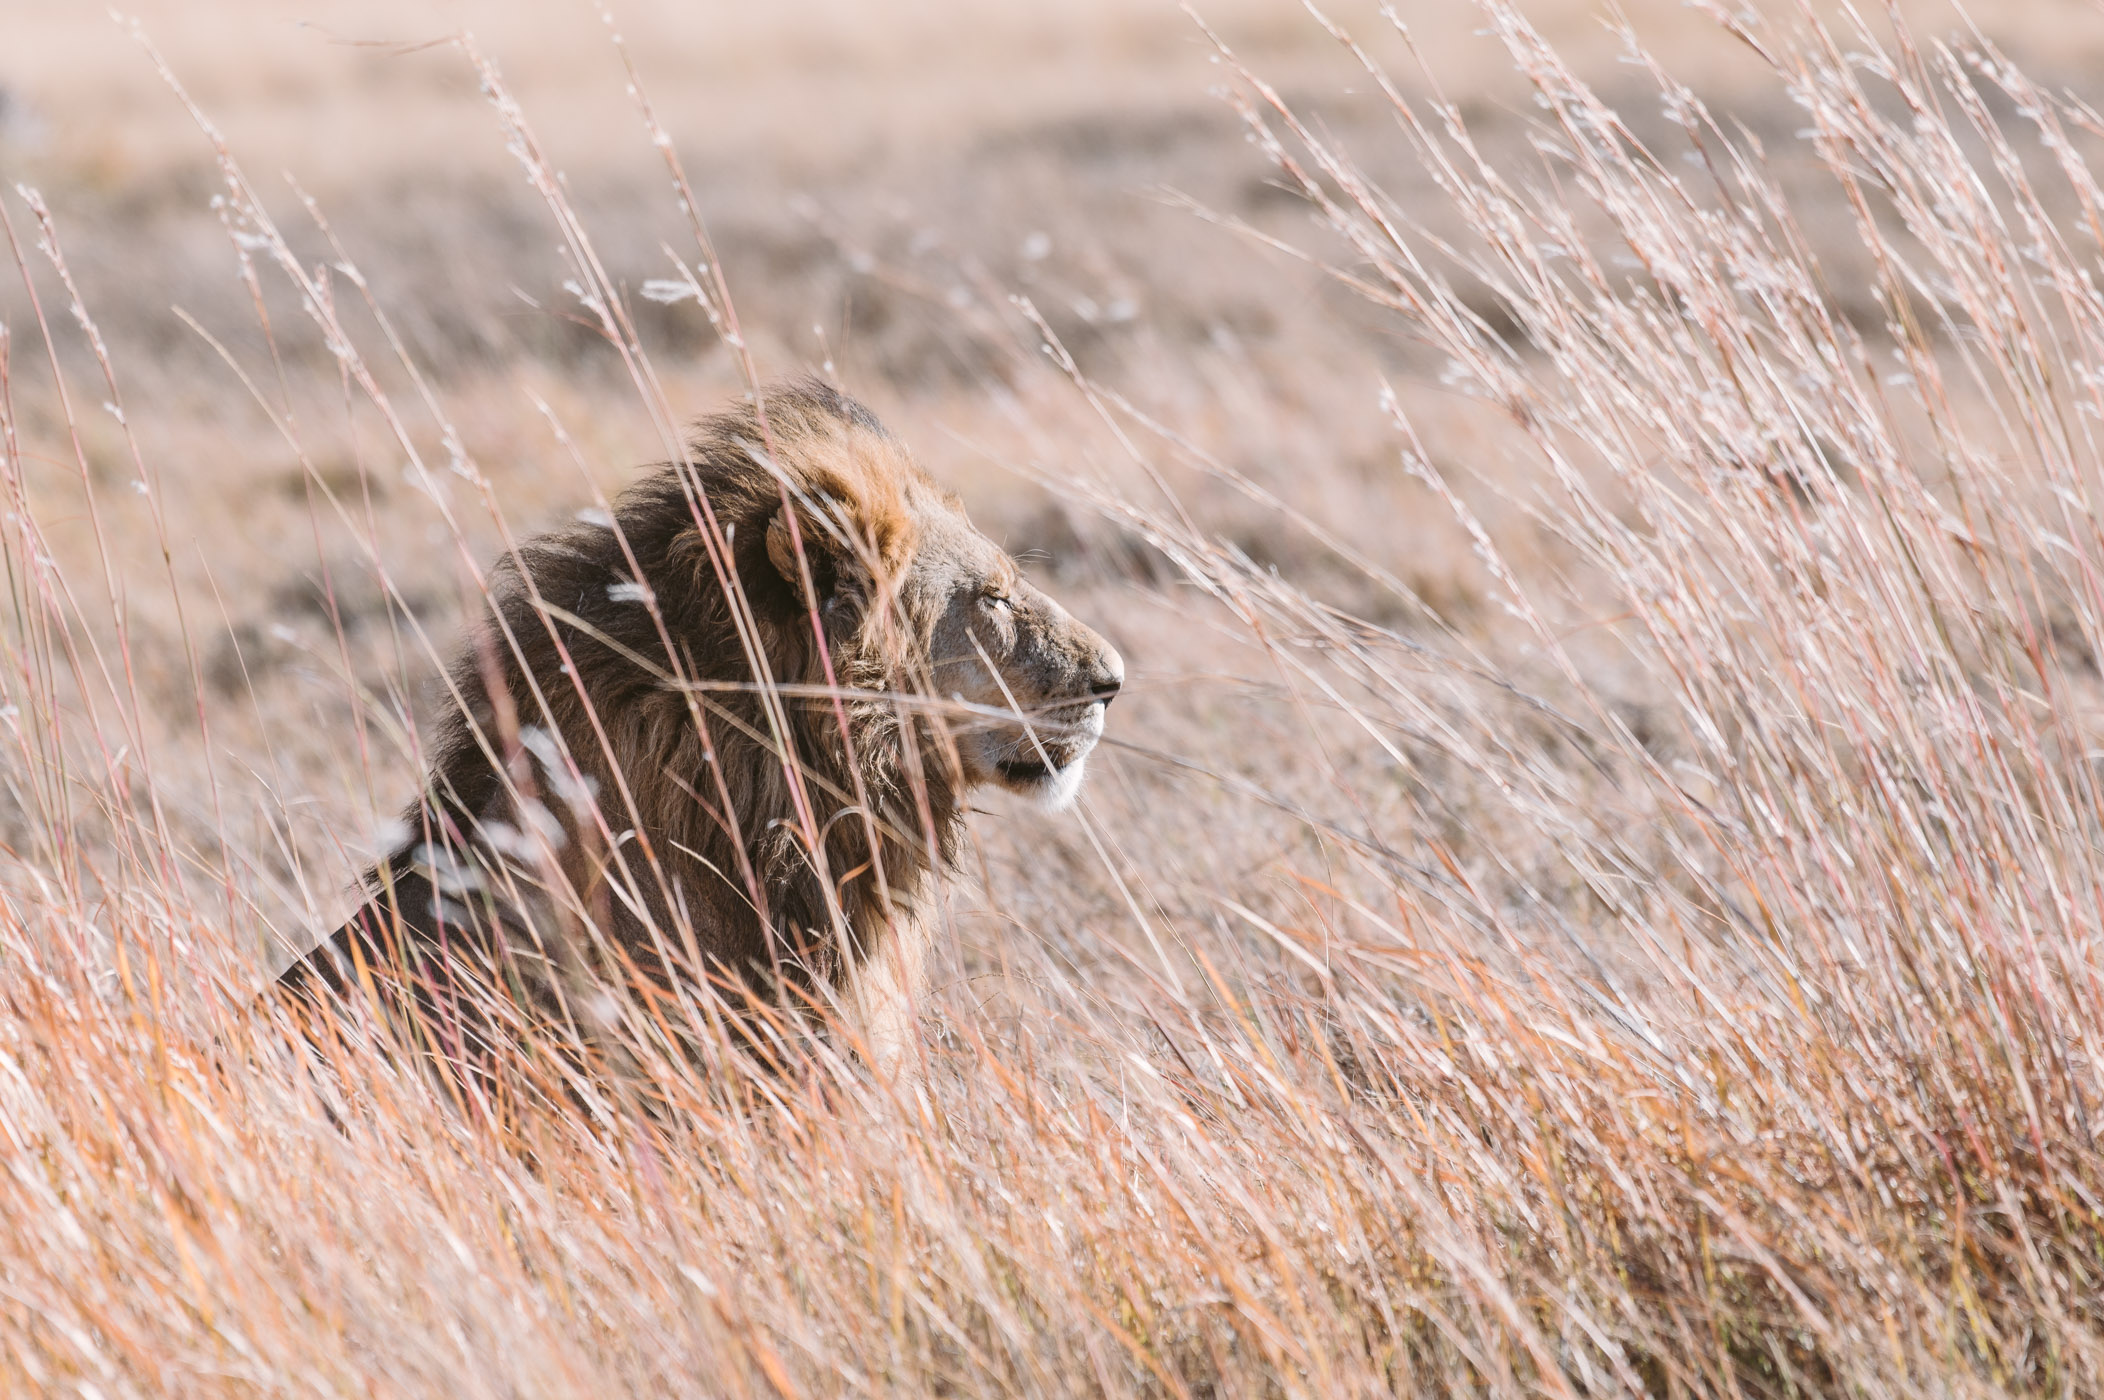
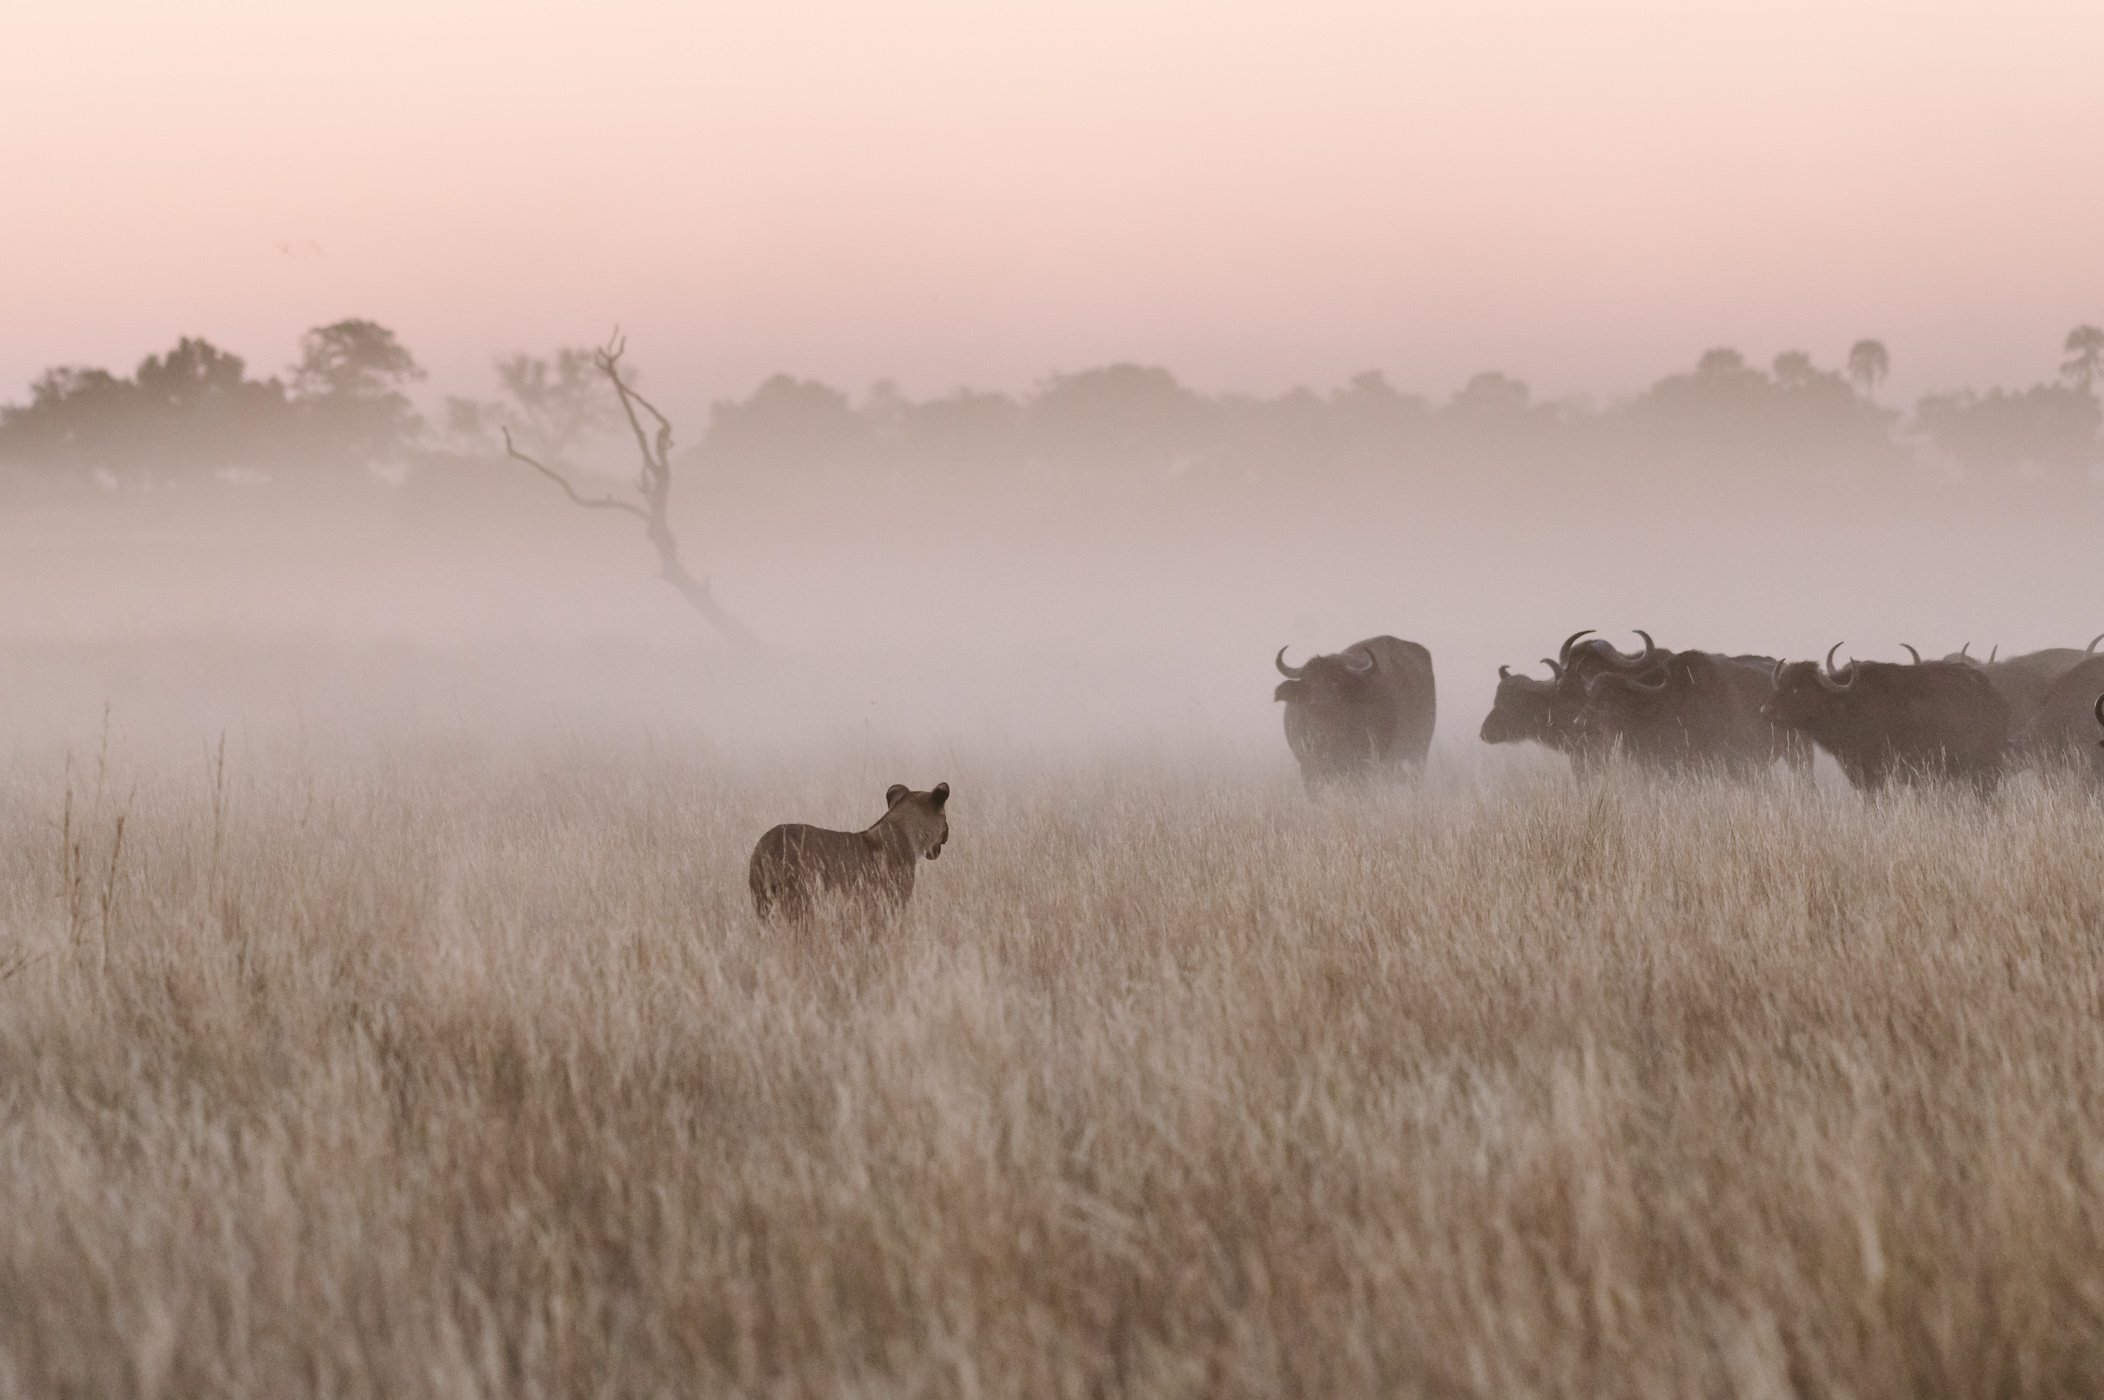
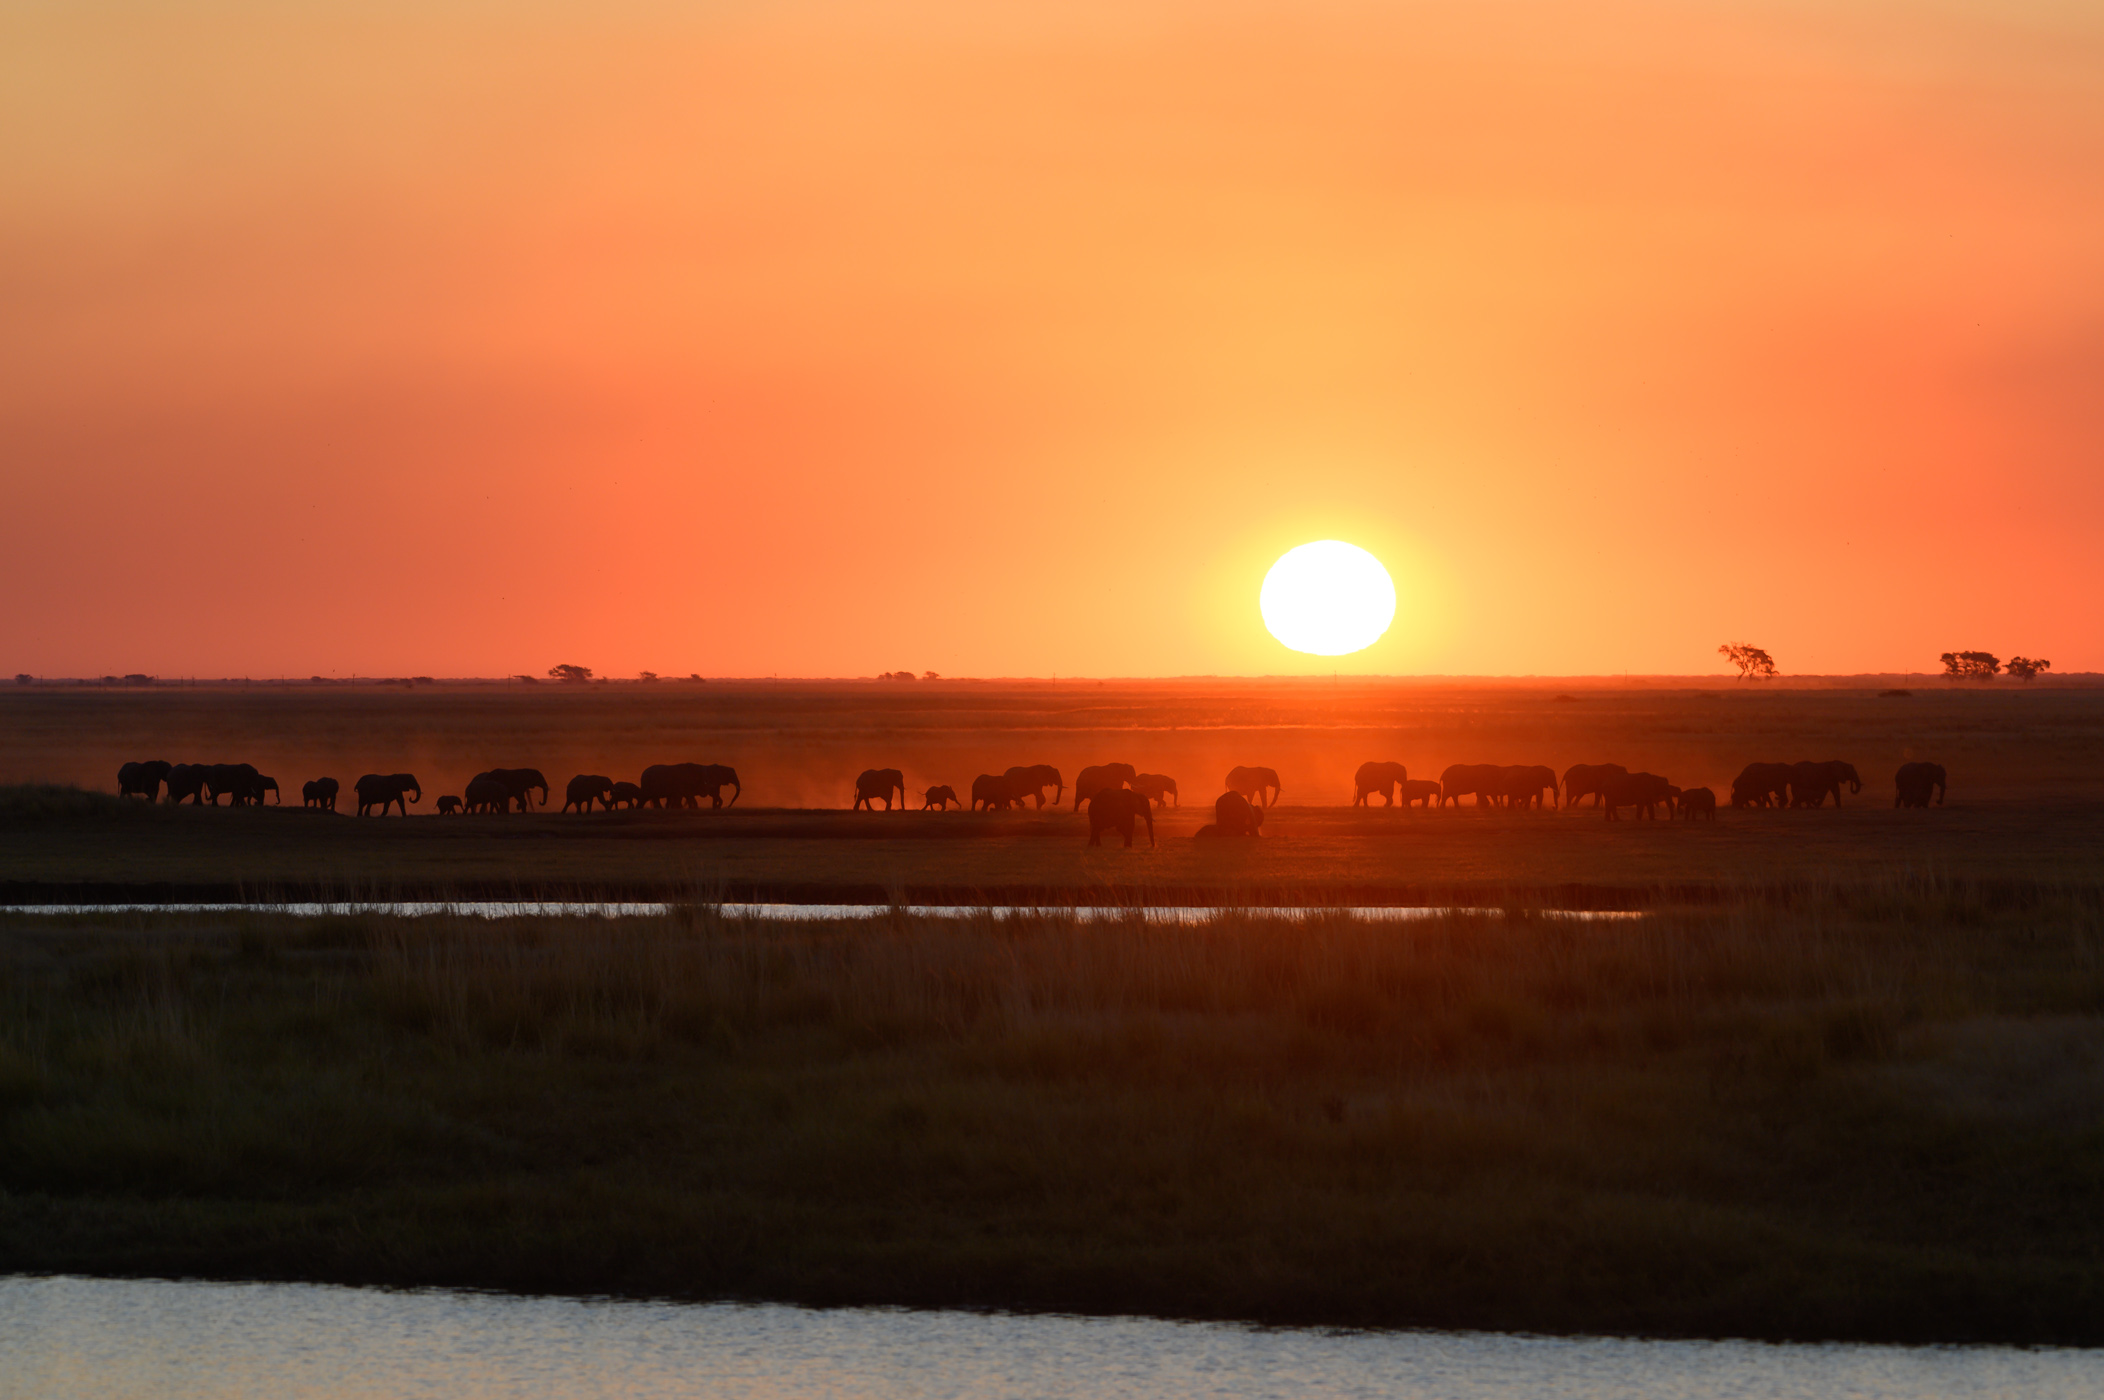
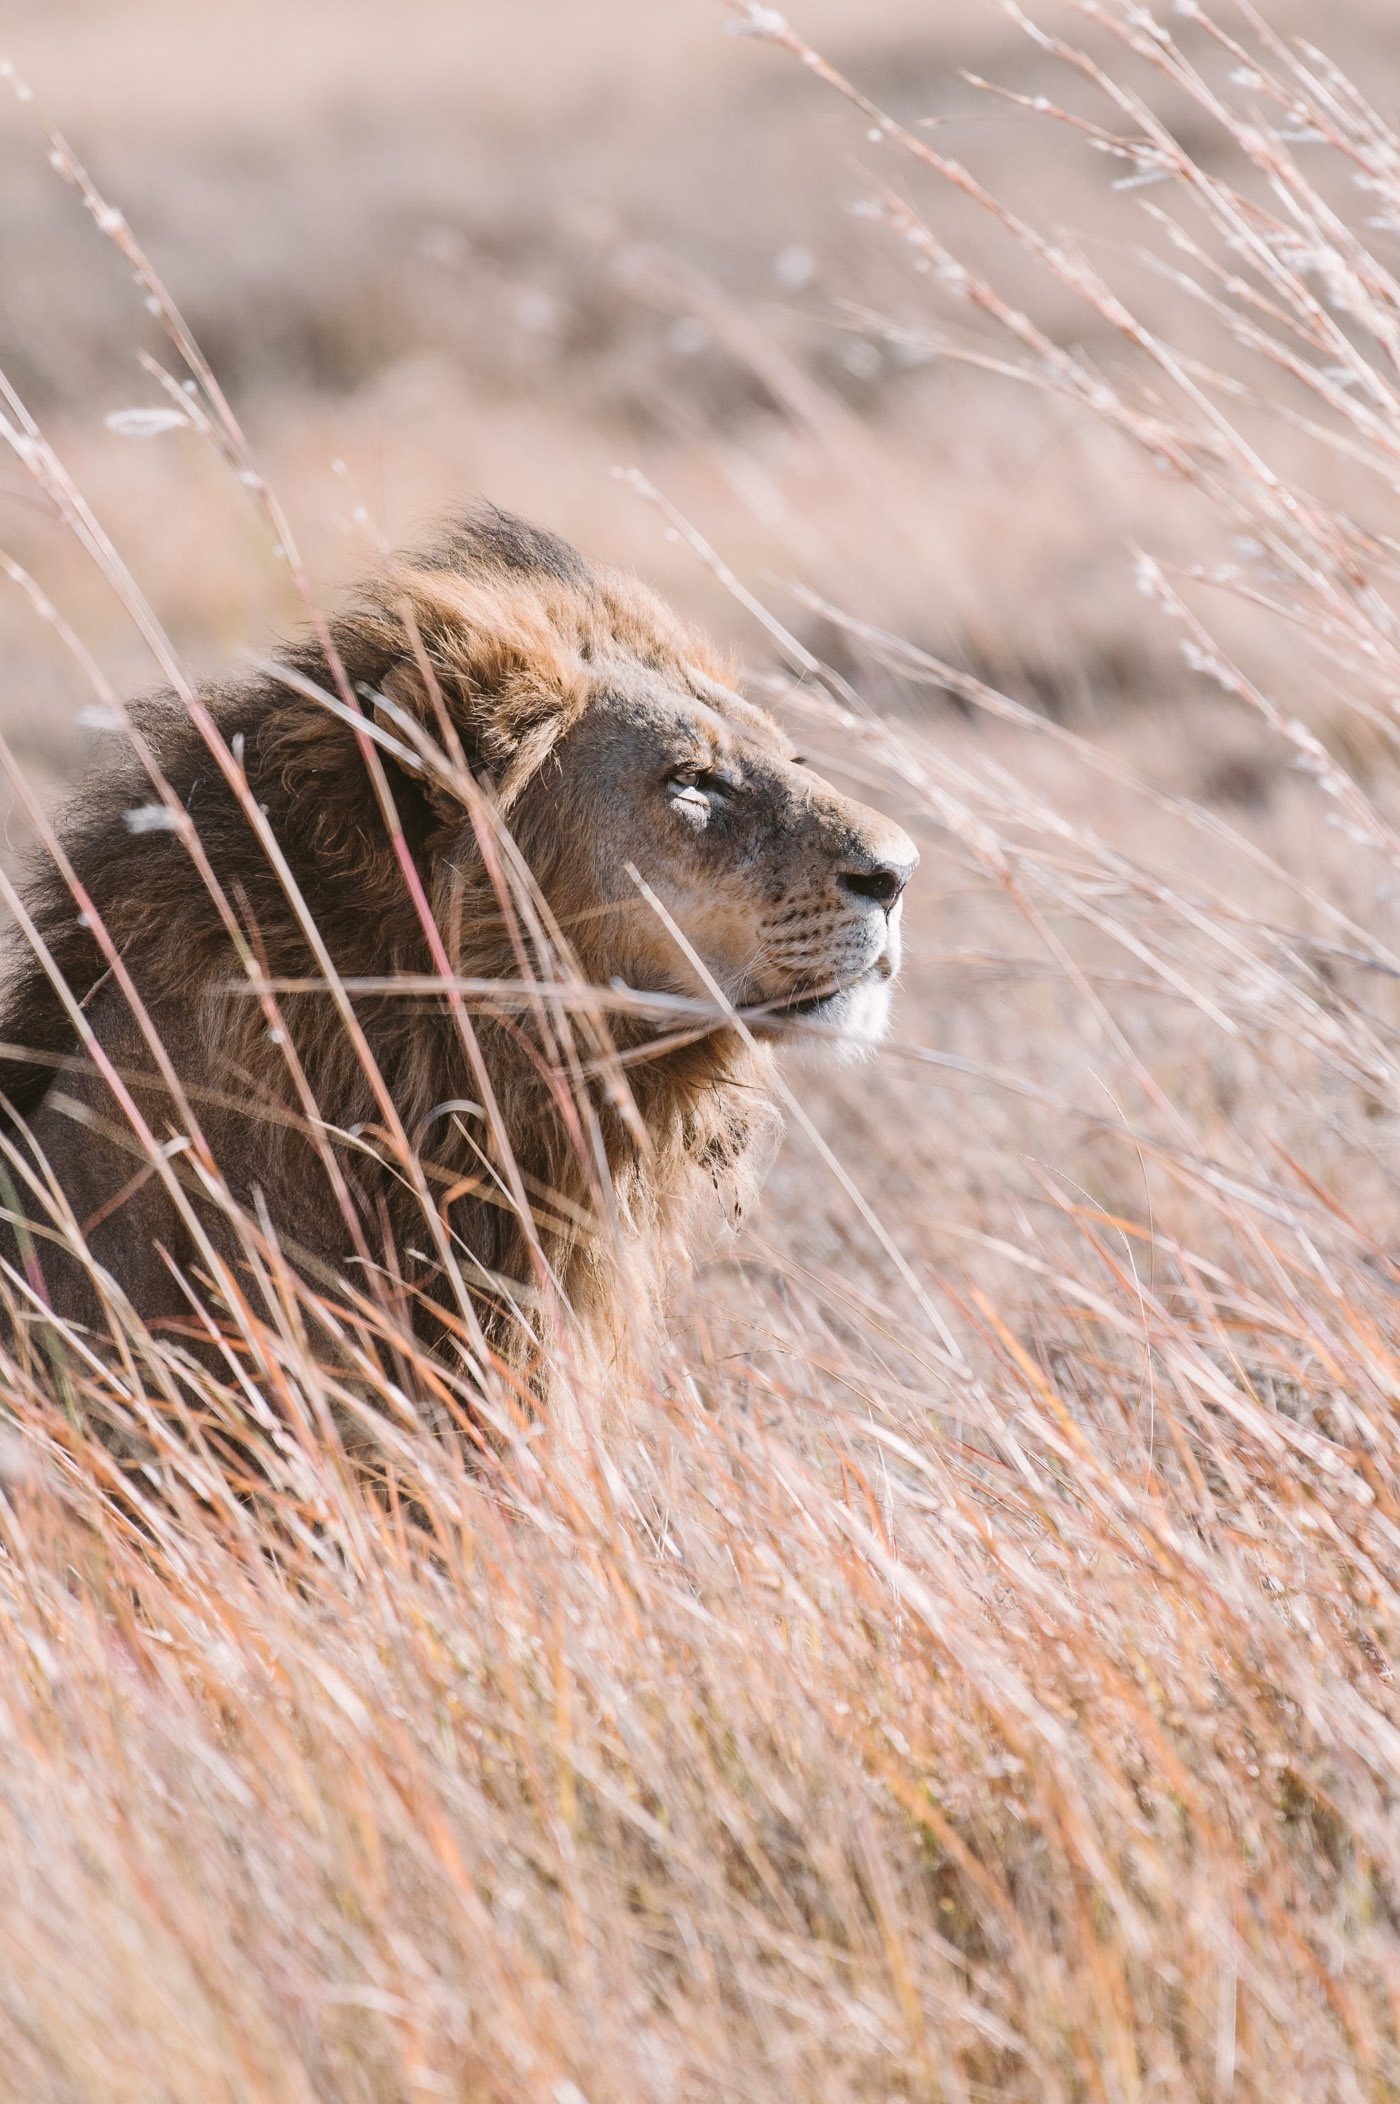
Scenes like these are what every wildlife photographer is dreaming of!
Soft light, a majestic cat, golden grass… perfection.
Settings: 320mm, f/5.6, 1/1000 sec, ISO 280.
Which lenses to bring for wildlife photography
Generally speaking it’s much more common, that animals will be far away from you (and your vehicle) when you are on a safari, as opposed to very close-by. Therefore it’s advisable to shoot on a long telephoto lens. Since Nikon has yet to release a telephoto, that is made for the Z mount of their mirrorless cameras, I opted for the F mount AF-S NIKKOR 200-500mm 5.6 lens and used it with the FTZ adapter. This lens is absolutely fantastic and works just as well with the Nikon Z 6 as with any DSLR.
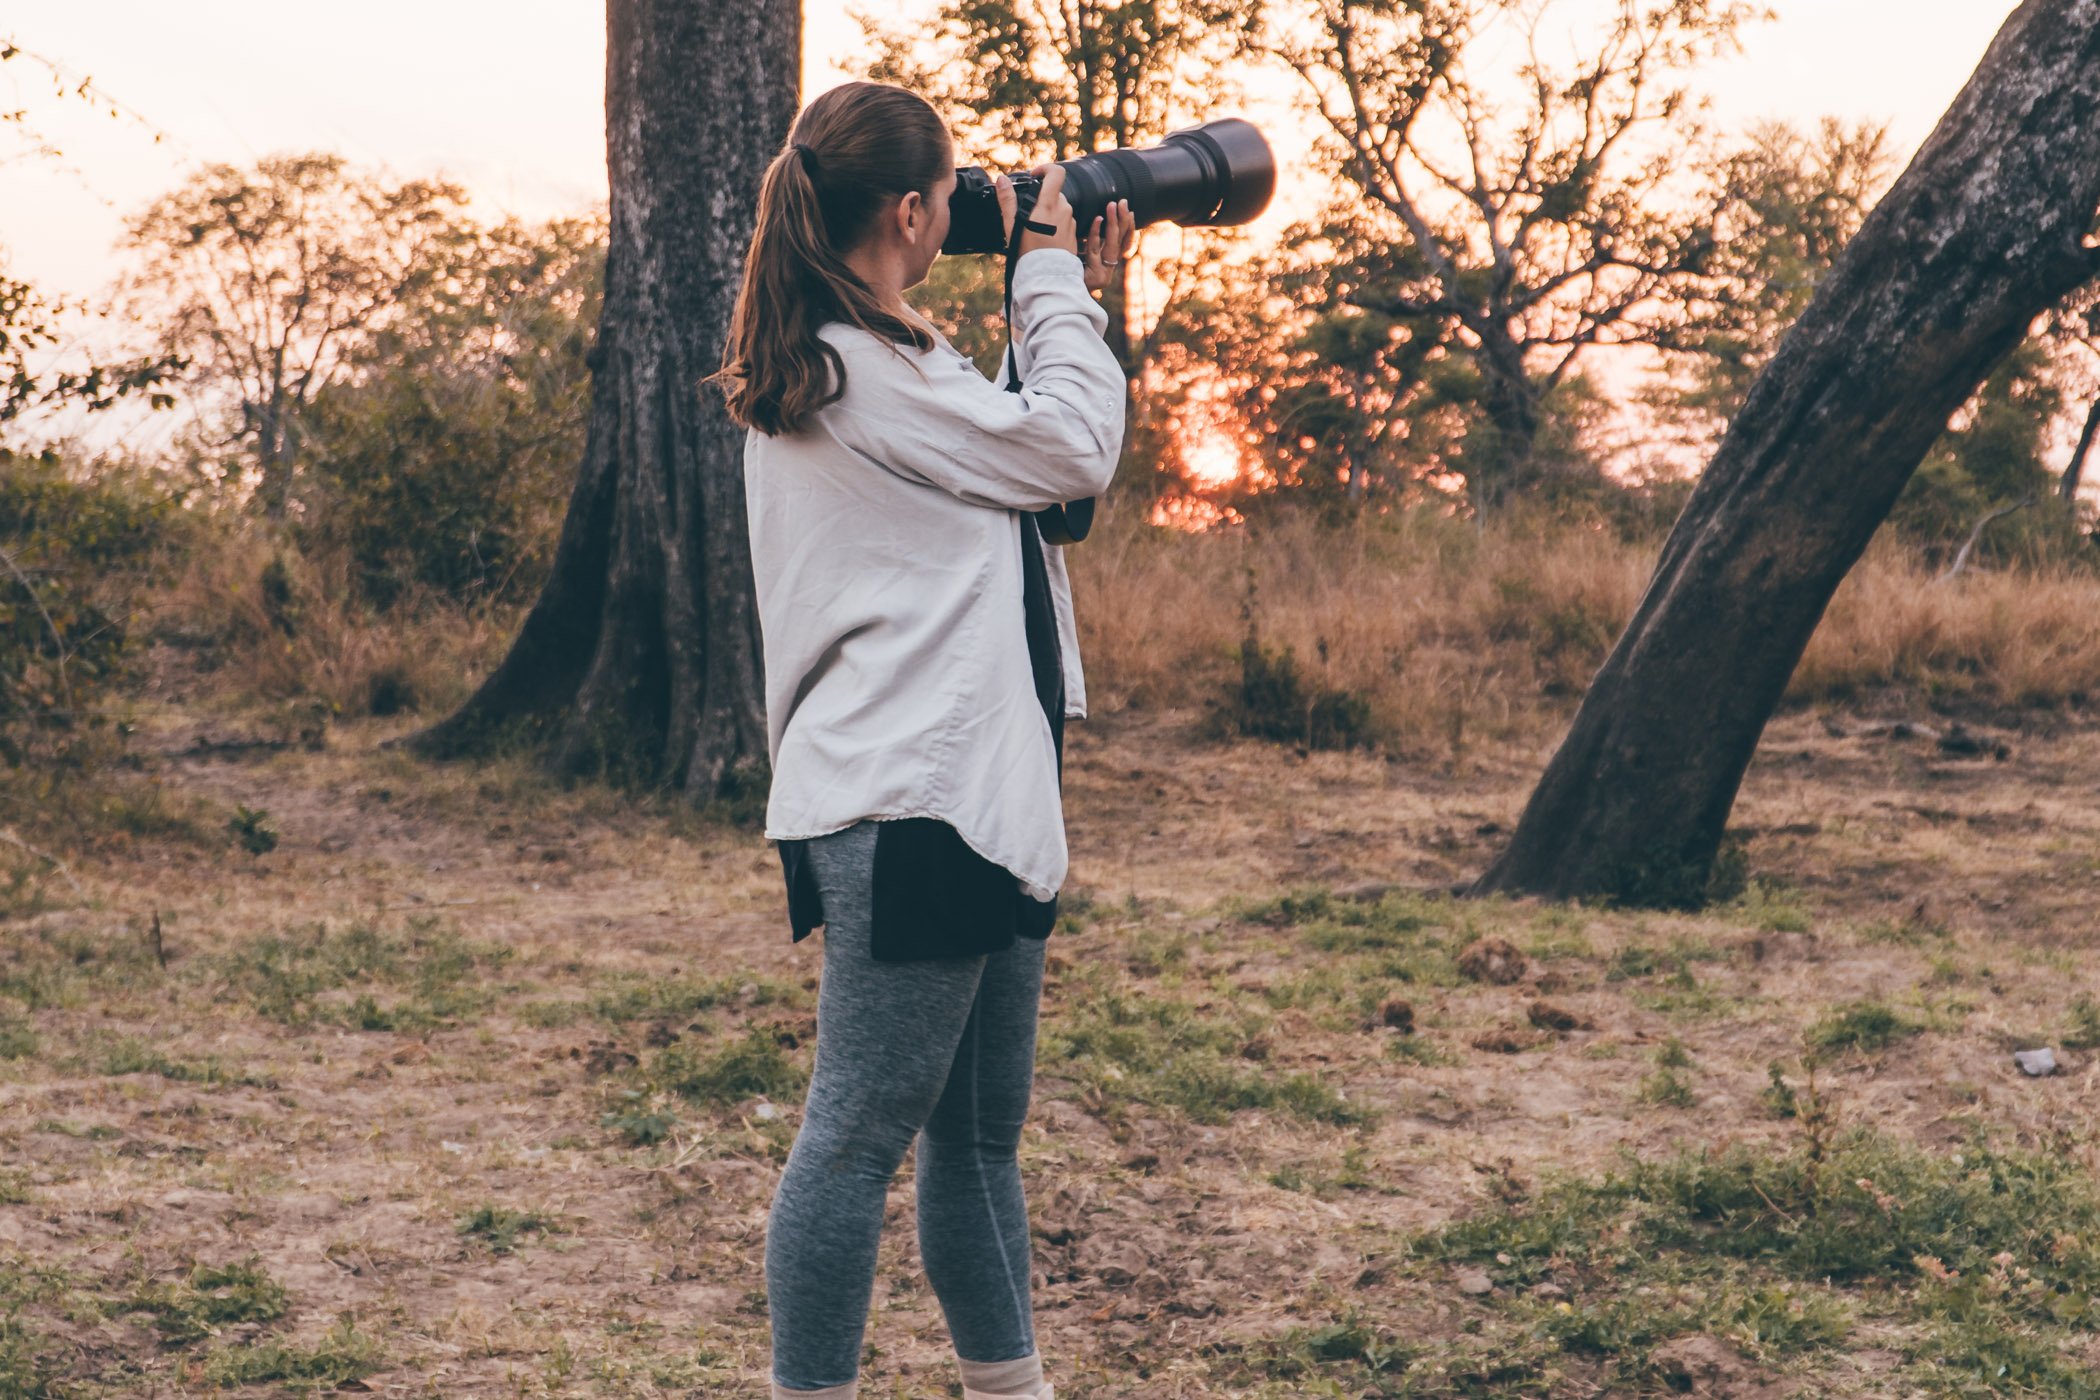
The AF-S NIKKOR 200-500mm 5.6 lens was my go to lens for wildlife photography.
It works perfectly with the FTZ adapter on the Nikon Z 6 – there’s no loss of speed or quality.
As this lens is quite heavy I usually tried to stabilise the lens by using one of the bean bags of the vehicle.
Shooting handheld was an exception.
Sometimes you want to shoot landscapes, people or just something that is very close-by. For these moments I opted for the new Nikkor Z 24-70mm 2.8 lens (which I brought instead of my 24-70mm 4.0 kit lens this time). With just one body this meant I had to switch lenses once in a while – sometimes even while in the car on a dirty road in the middle of the African bush. Let me tell you something: This is not the best idea! I had to thoroughly clean my camera every day due to all the sand and dust.
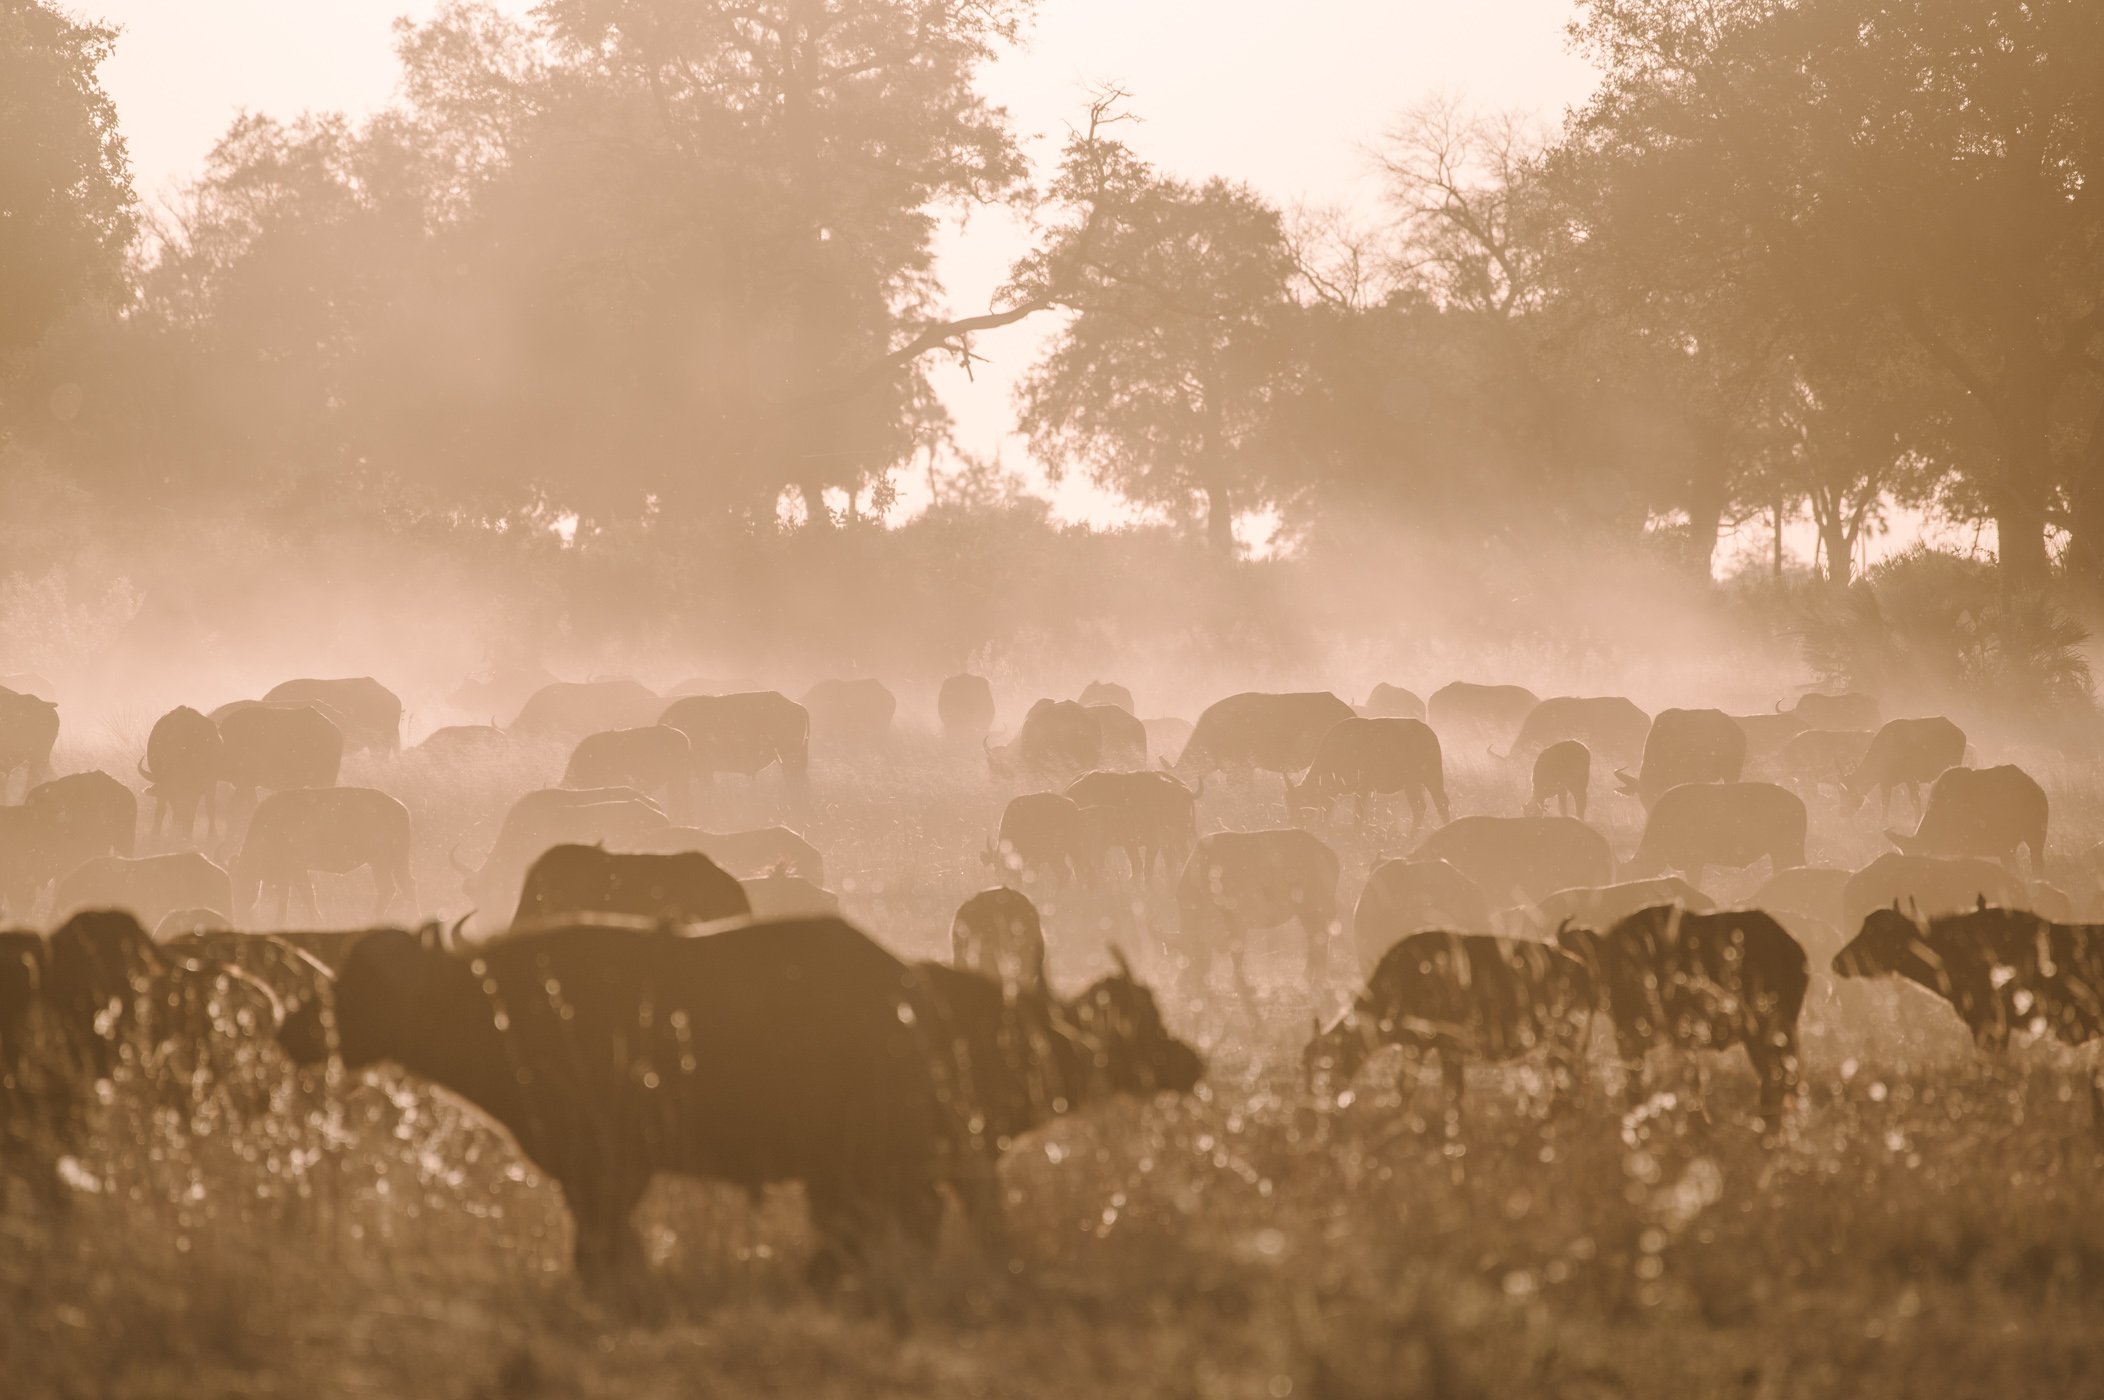
As you can see the air is dust-filled – which is very common on Safari.
Next time I will try to bring two bodies, so I don’t have to change lenses on the road!
My recommended camera setup for wildlife photography
Therefore I recommend to bring two bodies with two different focal lengths, so you’ll be prepared for different situations without having to change lenses:
- 2 x Nikon Z 6 bodies
- 1 x NIKKOR Z 24–70 mm 1:2,8 S
- 1 x AF-S NIKKOR 200-500 mm 1:5,6E ED VR with FTZ adapter
- 4 x EN-EL15b batteries
- 4 x 120GB XQD memory cards
Additionally I brought a wide angle lens to take photos of the lodges and for astro photography (the native NIKKOR Z 14–30 mm 1:4 S). But this is more a nice add-on and not a necessity on a safari.
The 200-500mm 5.6 lens is my recommended lens for safaris.
Last year I brought a 70-200mm with a 2x extender as an alternative, but I preferred this longer lens!
How to shoot wildlife: Settings & tipps
One of the challenges with wildlife photography is that you have no way to direct the animals 🙂 They have their free will and move, don’t care for good light or wait for you to be ready 😉 And to top it all off many of the animals prefer to be active at dawn or dusk (or even at night) when light situations get more complicated.
Sunset is the time when most animals start being active in the African bush.
Usually I shoot in full manual mode, but that’s not the best option on a safari. Here you have to use semi-automatic modes! Why? You will never be ready with setting your camera to get that one split second where the leopard looks at you through the thicket. Or while he runs from shade to bright sunlight and back again.
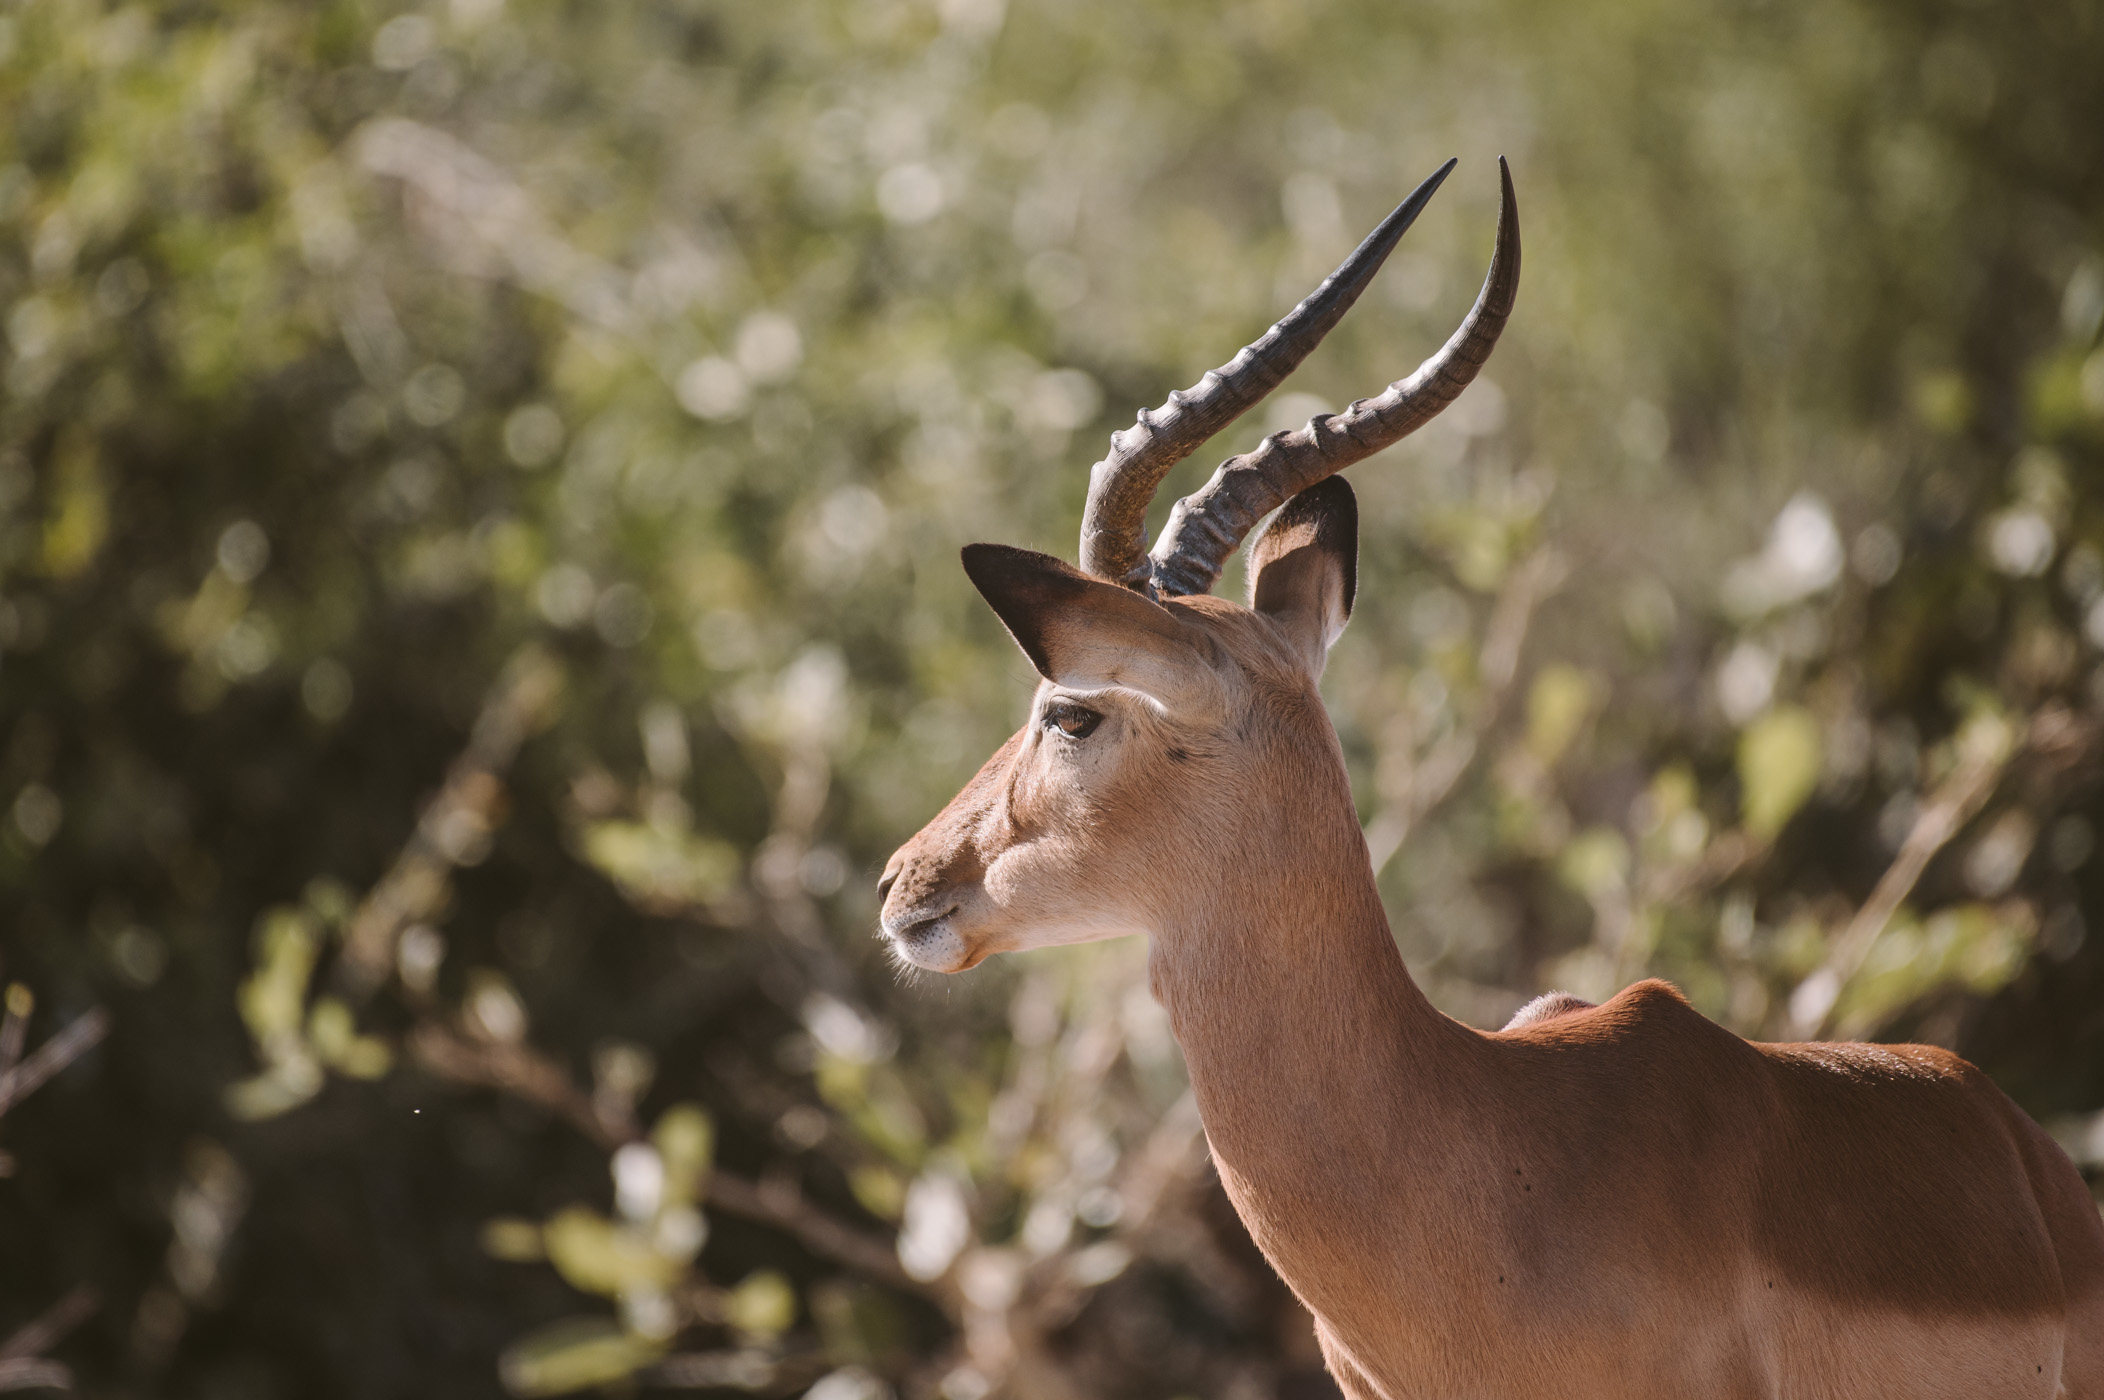
Animals often move fast from shade to sunlight and so on…
Manually setting the camera would often take too much time in these situations.
Settings: 240mm, f/5.6, 1/2000 sec, ISO 800.
Semi-automatic mode
When I prepared for this trip I read a bit about wildlife photography and found out that there’s basically two options to set your camera.
- Aperture priority
- Manual with auto ISO
Ad 1.) Aperture priority mode
With aperture priority you define if you want a open or closed aperture and the camera calculates the shutter speed automatically. I decided against this option, because I was afraid of too much motion blur with moving subjects. When an animal moves you will need to set the shutter speed to a maximum of 1/1000 or even less (with birds sometimes 1/3000 of a second)! That’s why I opted for the second option.
Ad 2.) Manual mode with auto ISO
When setting the aperture and shutter speed manually I still retained control over the two most important settings in my camera, while letting the Z 6 do the light metering. Obviously this way you run the risk, that the camera meters the light incorrectly and pushes ISO up too high, but this can be avoided by two simple settings:
- Limiting the ISO maximum: I set the max to 12.800, except for some very low light situations where I needed more ISO – like the leopard in the thicket).
- Opting for spot metering: This way the light is metered right off the animal you’re focusing on and not the whole scenery. I only used this in very low light situations.
I shot most of my wildlife photos with manual mode and auto ISO.
That’s why you can see that many of my photos have the same basic settings:
(f/5.6 and 1/1000 sec) and only the focal length and ISO changes.
Settings: 500mm, f/5.6, 1/1000 sec, ISO 640.
Exposure compensation
The only thing I had never used before is exposure compensation, as I was always shooting in manual so far. While in Botswana we actually went on a photography safari with an expert and there I learnt a bit about using exposure compensation as one more way to get the correct light settings when shooting in semi-automatic modes like aperture priority. This way you can push your exposure up or down by a maximum of 5 stops, which is also a great way to get the right settings without having to use all manual mode.
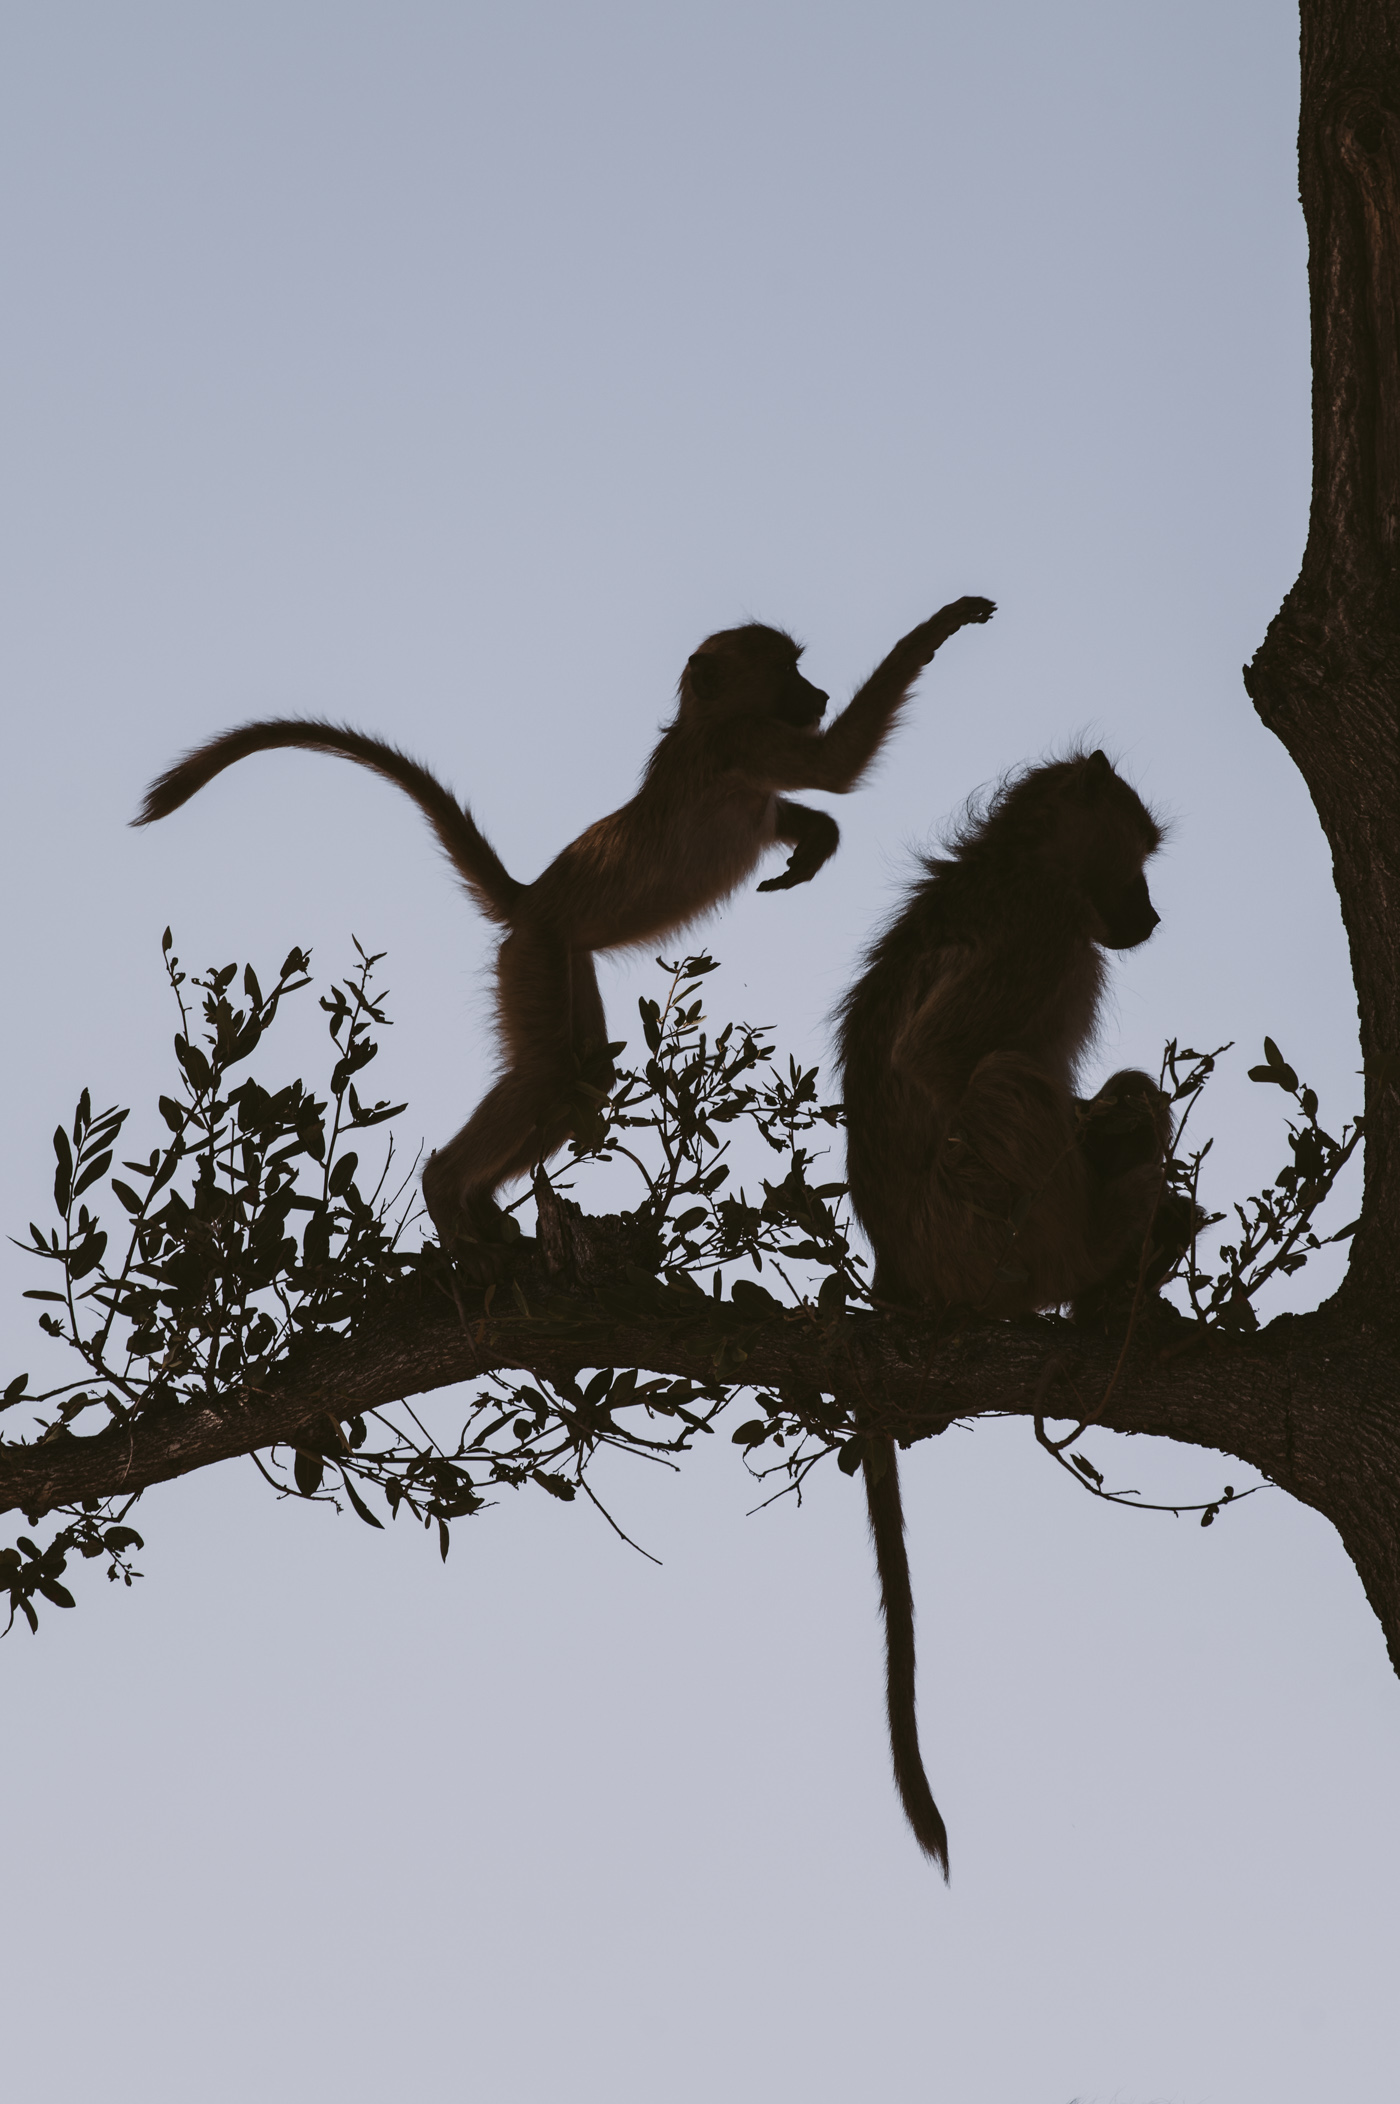
In some situations you might want to fully control the exposure.
For example when you want to focus on silhouettes like these and not overexpose the baboons.
Settings: 380mm, f/5.6, 1/1000 sec, ISO 160.
Examples of wildlife photos shot on Nikon Z 6
So, let’s just look at a few examples of some of the wildlife photos I took in Zambia and Botswana with the Nikon Z 6. Of course I’m not perfect and I also still make many mistakes, even after years of shooting in manual mode… (in the end I’m still not super talented when it comes to technical stuff 🙂 ). But the best way to learn is by looking at the examples:
Settings: 480mm, f/5.6, 1/1000 sec, ISO 100.
This light situation was ideal – the leopard was brightly lit.
The challenge was focusing on him in all the grass!

Settings: 240mm, f/5.6, 1/1000 sec, ISO 3.600.
As the lion and the buffalos were constantly moving I keep the shutter speed at 1/1000.
In hindsight it would’ve been better to adjust the shutter speed in these moments where the animals stood still to drop the ISO a bit and avoid too much grain.
Settings: 390mm, f/5.6, 1/1000 sec, ISO 320.
The lion was actually quite still in this scene, so I could’ve dropped the shutter speed to 1/700 or 1/800.
But ISO 320 is still very decent and there’s no grain in this photo.
Let me also show you a photo, that I love, but unfortunately didn’t get quite right and let’s look at why & how I screwed it up:
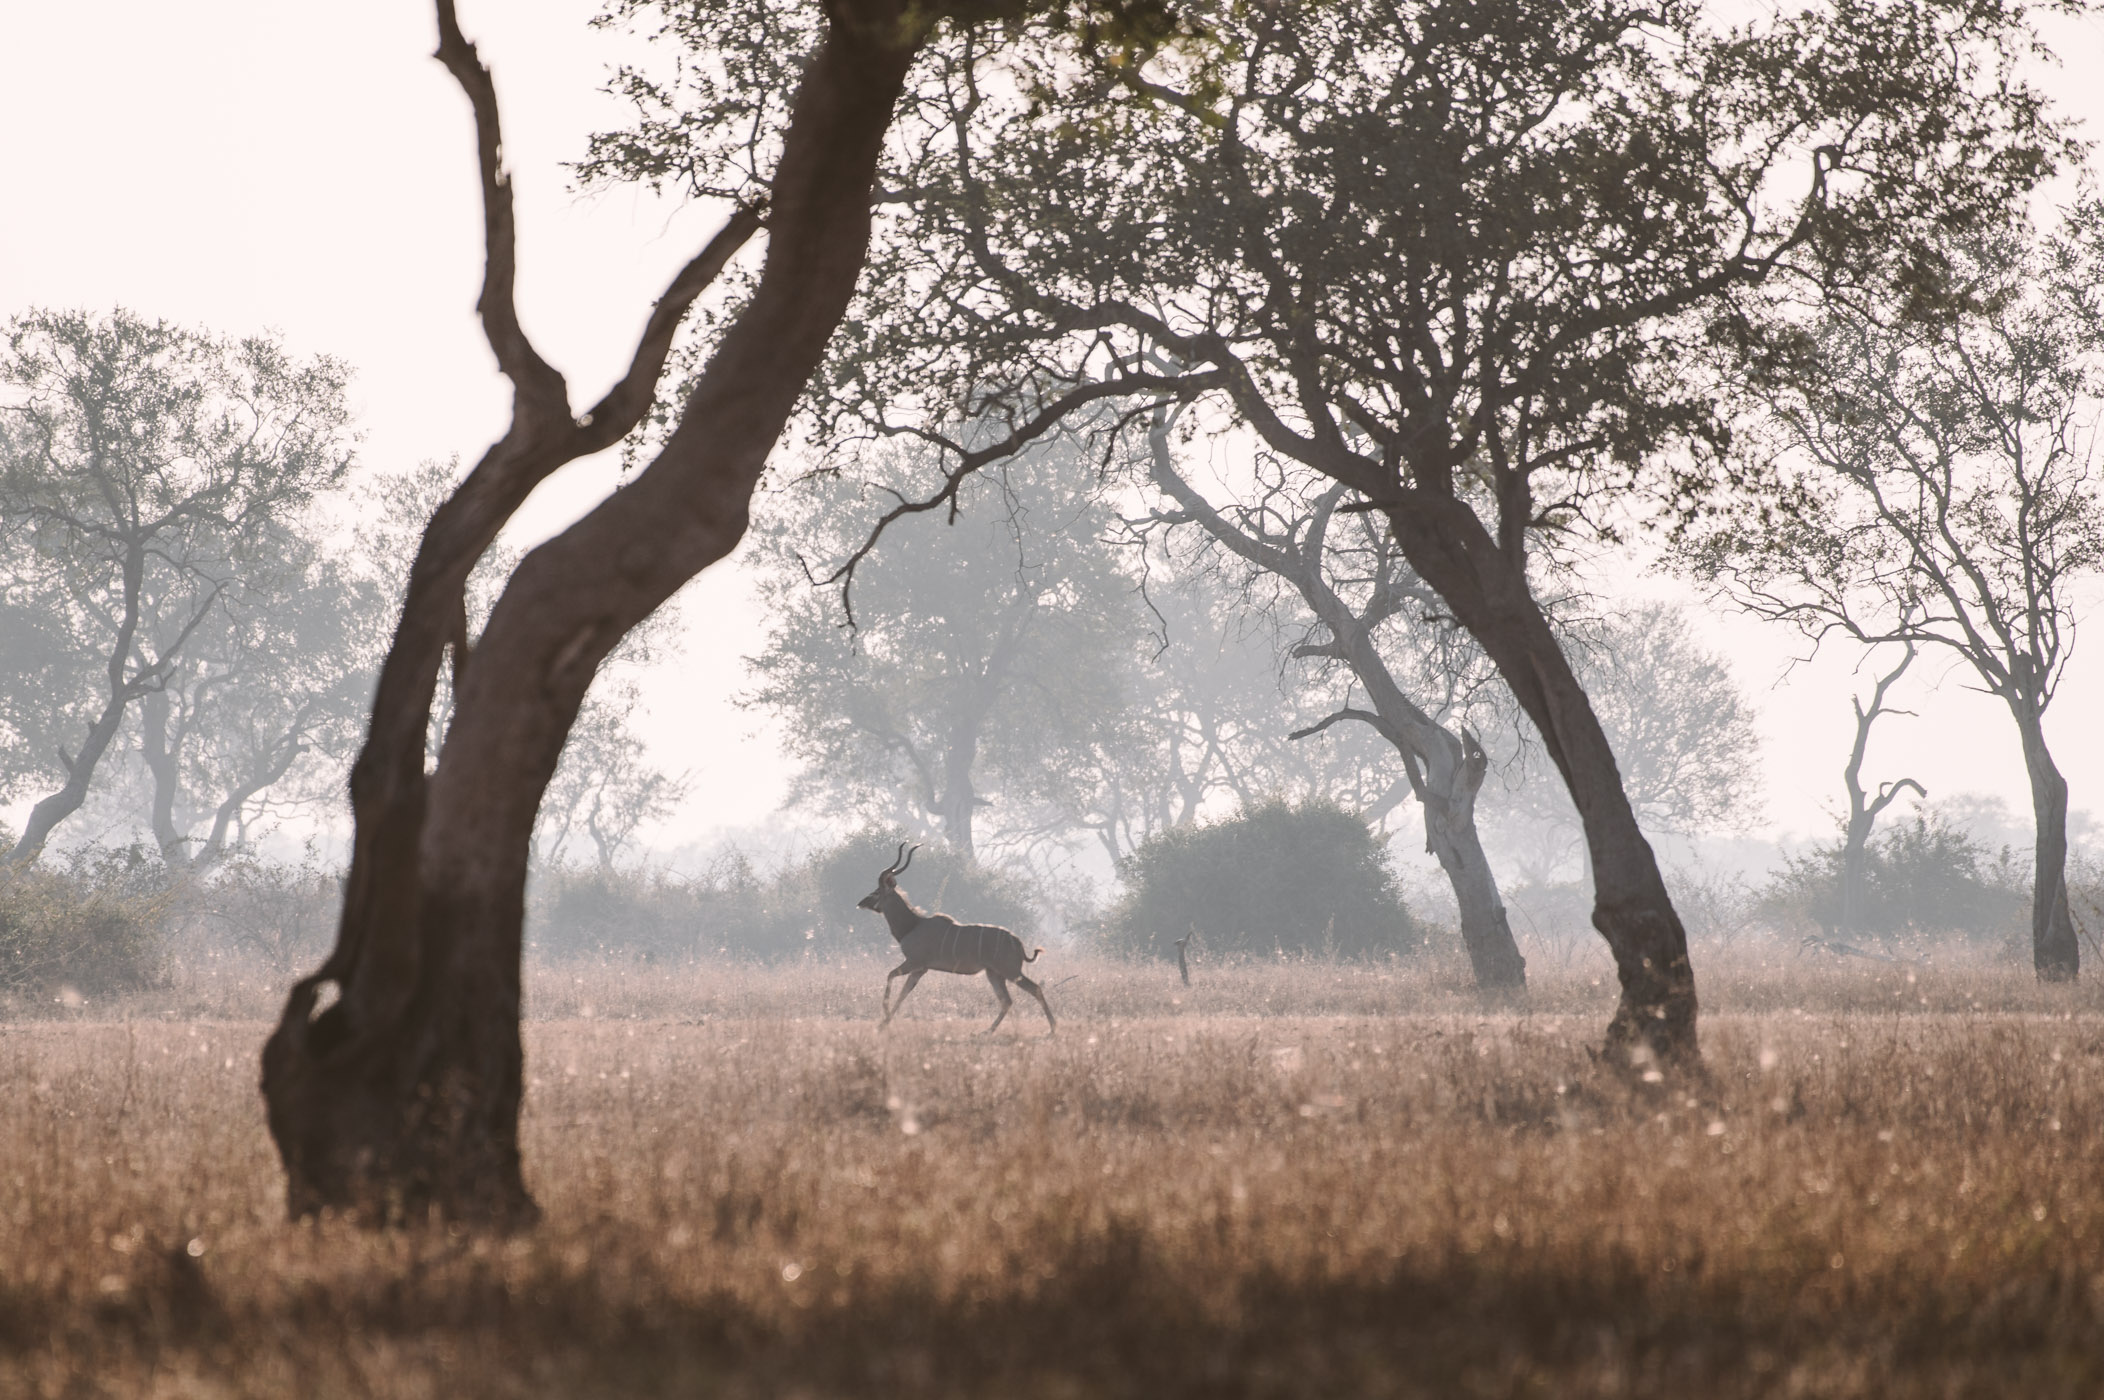
Settings: 450mm, f/5.6, 1/800 sec, ISO 125.
This was one of the first photos I took early in the morning on one of our first game drives.
Unfortunately I hadn’t memorised the ideal shutter speeds correctly yet. This Kudu was quite far away and running.
So with 450mm focal length the shutter speed per se shouldn’t be any longer than 1/900 of a second.
And when an animal is running it has to be even shorter to avoid motion blur.
I could’ve lowered the shutter speed to 1/3000 easily, as the ISO would’ve still been low enough.
Additional news: Nikon Z 6 Autofocus update in new firmware
In May 2019 Nikon released a firmware update for both Z 6 and Z 7 to improve the autofocus capabilities of the cameras.
Nikon has released this firmware update with a much sought-after feature: The automatic eye-detection. This is mostly used for portrait photography, so I didn’t test it yet – but I can’t wait to test this on my next trip with the Z 6. The eye-detection works in single and continuous autofocus mode, making it available for both still and moving subjects!
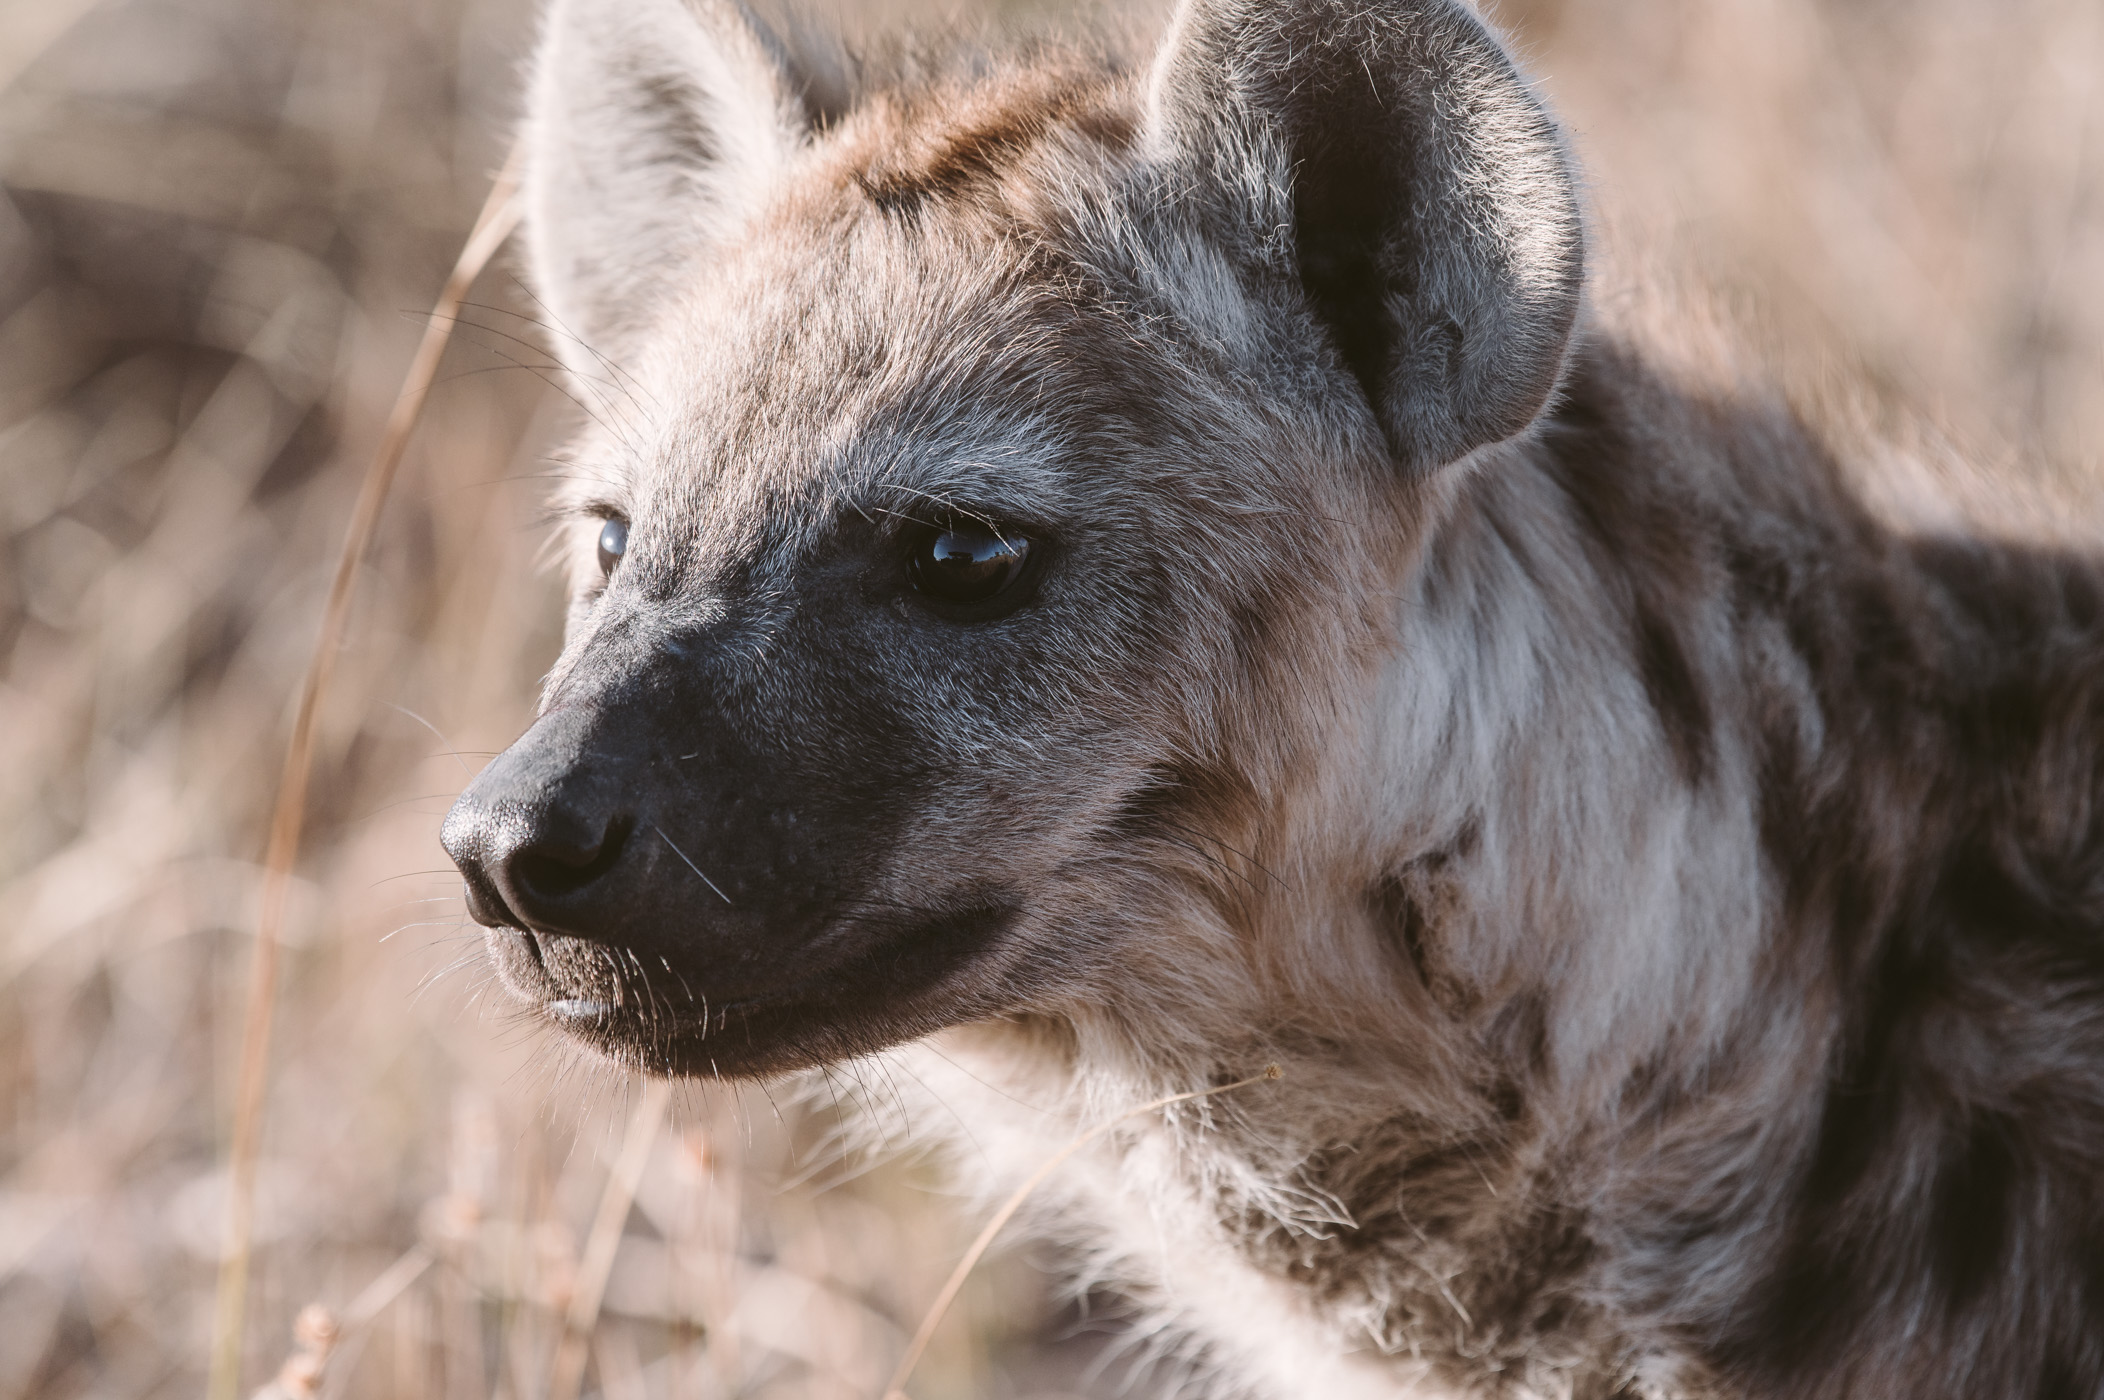
Settings: 350mm, f/5.6, 1/1000 sec, ISO 640.
My take-away from shooting wildlife with the Nikon Z 6
When compared to my experiences with my DSLR last year in Namibia I can only say I’m so happy that I switched to the new Nikon Z 6. The image stabilisation is just a ton better and also the light metering was really on point. I found myself being able to shoot a lot more scenes than last year, where I sometimes really struggled with getting the shots I had dreamt of.

My output from this safari has been a lot better than last year’s results with my old DSLR.
More photos were in focus, sharp and also metered correctly.
Maybe it also has to do with my skills, that evolved a bit within this year 😉 But the camera also definitely adds to my abilities and I can honestly recommend switching to the mirrorless Nikon Z 6, which I was really unsure of before I made the switch.
Read more about my experiences with the Nikon Z 6 shooting landscapes and portraits in Madeira and testing it for the first time in South Tyrol.